
On a polished form, the stainless steel sculpture finish is the sculpture. Fabrication gives the piece its shape; the surface is what a visitor actually sees, photographs and remembers. It is the last thing applied and the first thing that can go wrong — a scratch, a weld ghost, a fingerprint trail or a patch of water spotting will undo months of shaping in a single season. This guide covers the four finishes we produce most often: mirror-polished, satin brushed, hairline and bead-blasted.
Why the finish is the most expensive part of the sculpture
Clients are often surprised that the metal is not the expensive part. Stainless plate is a commodity; the hours that turn it into a flawless reflective skin are not. On a mirror commission, finishing routinely accounts for 30–50% of shop time and, on complex double-curvature work, more than half.

A mirror surface cannot be sprayed, dipped or bought. It is built in stages, by hand, and each stage must erase the marks of the one before it:
- Weld dressing. Every seam is ground flush, then re-ground finer, because a mirror never lies about a weld — a 0.2 mm ridge becomes a distortion that travels across the panel.
- Progressive abrasion. The surface is worked through a grit sequence, typically 80 up to 800–1500, each pass removing the scratches of the previous one.
- Layout and inspection. Polishing happens under controlled raking light, section by section, with panels tilted so the operator sees what a passer-by sees at grazing angle.
- Buffing and passivation. Cutting compound, a fine rouge stage, then cleaning and acid passivation to restore the chromium-oxide layer that polishing disturbed.
Finish is therefore not only aesthetic but a durability decision. The more reflective a surface, the more it shows: water spotting, fingerprints, micro-scratching and the chloride pitting that eventually breaks the passive layer. A matte surface often outlasts a mirror on a hostile site, not because the steel differs but because it has less to lose. See how that lands in the quotation in our breakdown of what drives stainless steel sculpture cost.
Mirror-polished
Mirror polishing takes the surface to a near-optical finish, typically 8K or No. 8 on the mill scale, where a reflection is essentially undistorted. It is the finish most people picture when they hear “stainless steel sculpture,” and the one that most reliably turns a piece into a landmark.
What a mirror finish looks like
The metal stops reading as metal and starts reading as a curved mirror. It takes its colour from its environment: grey sky becomes soft silver, sunset becomes bronze, planting becomes green-gold. Edges appear to dissolve, and a sphere genuinely reads as a sphere because you can see the world wrapping around it.
What mirror polishing costs
Against a bead-blasted baseline, expect a mirror finish to add roughly 2–4× to finishing cost on the same geometry — and the multiplier climbs with surface area, on curved panels, and wherever a weld falls across a visible face.
What a mirror finish is vulnerable to
- Water spotting. Rain or irrigation left to dry leaves mineral rings that etch in; in hard-water regions this happens within weeks outdoors.
- Fingerprints. Skin oils bloom into dull patches, fastest at the height people touch.
- Scratches. Any contact leaves a bright line that cannot be spot-repaired; a mirror panel usually has to be re-polished as a whole field.
- Chloride pitting. Coastal air or chlorinated water attacks the passive layer at the polish’s fine grain boundaries, producing pinhead pits that bloom outward.
Where a mirror finish earns its place
Mirror is right in dark or enclosed interiors, where a reflective skin doubles the light; for landmarks meant to be photographed; and for water features where the reflection of the piece and of the water reinforce each other. Our mirror ball garden installation is the third case — the ball’s whole visual argument depends on the polish.
Satin / brushed
Satin, or brushed, is the mid-range compromise and the finish we specify most often for architectural work. The surface carries a fine directional grain, produced by running an abrasive belt in one consistent direction, that softens reflections without killing them. There is still sheen and still a sense of metal, but the piece no longer behaves like a mirror.
The advantage is forgiveness. Scratches that would be obvious damage on mirror disappear into the grain, water spots dry to far less visible residue, and fingerprints read as nothing. Cost sits meaningfully below mirror and above bead-blasted: a moderate premium rather than a multiple.
Grain direction is where satin finishes are won or lost, and it matters most on curves:
- Consistent direction. Usually vertical on wall panels, so light raking down the face reads evenly, and horizontal on handrails and trims.
- Curves change the reading. On a compound-curved form a single grain direction appears to rotate as the surface turns away. Good satin work either follows the form’s principal curvature or is finished so uniformly that no banding shows.
- Weld zones. Joins must be re-grained locally to match their surroundings; grain running against its neighbours is the most common satin defect, and it shows only after installation, at grazing angle.
- Repairability. Satin is genuinely field-repairable — a damaged area can be re-grained on site to blend in, which is effectively impossible with mirror.
For lobby entrances, interior feature walls and sheltered architectural pieces, satin gives the best ratio of impact to long-term effort.
Hairline
Hairline is a finer linear finish than satin: a very light, continuous grain with low surface roughness, historically specified as No. 4 and now more often described by the abrasive grit used. It reads as a soft directional glow — clearly not mirror, but far closer to reflective than brushed work.
The boundary between hairline and brushed is not technical. Both are directional abrasion finishes; grit, pressure and passes decide which you get, and the same steel can be taken to either. What separates them in practice is commercial: the term the specifier writes down, the sample they approve, and the surface the shop is willing to defend under that name. Two suppliers can deliver “brushed” stainless that differ visibly — one a coarse grey scuff, the other a feather-fine sheen.
Hairline suits work where a satin grain looks too coarse but mirror is too demanding: reception counters, elevator interiors, signage bands, and the secondary faces of large sculptures where a mirror front would otherwise force you to polish the back.
Because the grain is fine, hairline sits closer to mirror in care requirements than brushed does. Always ask for a physical sample: in this finish the name alone carries very little information.
Bead-blasted
Bead-blasting bombards the surface with fine glass or ceramic beads under pressure, peening it into a uniform matte texture. Light arriving at the surface scatters instead of reflecting coherently, so the result is a soft matte grey that reads as a solid colour. On the mill scale this family sits at the matte end, roughly No. 6 or a specified surface-roughness (Ra) reading.
For outdoor sculpture, bead-blasting is often simply the right answer, and the reason is maintenance rather than aesthetics:
- It hides what mirror punishes. Water spotting, dust films, bird lime and light handling marks blend into the texture instead of standing out against it.
- It survives public contact. On an exposed plaza, a high-gloss surface will not stay glossy — and a mirror that has lost its perfection looks worse than a matte that never claimed any.
- It holds sealant. The micro-texture gives protective treatments something to key into, which extended-life sealing systems need.
- It is uniform across a large form. Slight reflection variation between panels — the thing that ruins large brushed or mirrored assemblies — is far less noticeable on matte.
The trade-off is that a matte finish cannot afterwards be made to look like a mirror, and it mutes crisp edges and fine detail. If the design’s whole point is a perfect reflection, bead-blasting is wrong; if the piece must live outdoors, in public, in weather, it is usually right. Our geometric park sculpture uses a matte outdoor treatment for that reason: the forms carry the piece, and the surface still looks intended in year ten rather than year one.
A stainless steel sculpture finish comparison table
The table summarises the four finishes across the dimensions that matter in a real specification. Cost premiums are quoted against bead-blasted as the baseline.
| Finish | Reflectivity | Cost premium vs bead-blasted | Maintenance effort | Best sites | Worst sites |
|---|---|---|---|---|---|
| Mirror-polished | Near-optical; undistorted reflection | 2–4×, highest on large curved welded faces | High — routine cleaning; re-polish by field | Dark interiors, reflective landmarks, water features, photographed focal points | Coastal air, chlorinated pools, public plazas within reach |
| Satin brushed | Directional sheen; soft reflection, no image | About 1.3–1.8× | Moderate — field-repairable; scratches blend into grain | Interior feature walls, lobby entrances, architectural screens | Salt-spray coastal exposure; areas scuffed hard |
| Hairline | Fine directional glow, nearer reflective than brushed | About 1.5–2.2× | Moderate to high — grain shows prints more than brushed | Reception counters, elevator interiors, signage bands | Public touch zones, coastal sites, high-traffic outdoor floors |
| Bead-blasted | Matte — diffuse, low reflectance | Baseline (1×) | Low — marks blend in; no polishing required | Exposed outdoor sculpture, public plazas, parks, coastal sites | Dark interiors where reflection is the intent; work needing sharp-edge crispness |
Two things follow. Maintenance effort is a decision made at specification time, not a cost discovered later — a finish that is cheaper to buy is often more expensive to own. And surface condition is only half the durability story: a bead-blasted skin will not save a piece whose welds or brackets are under-designed, which is why finish sits alongside structural condition in our guidance on wind loading on large stainless steel sculptures and in our outdoor stainless steel sculpture maintenance guide.
Finish and site: matching a stainless steel sculpture finish to the site
Finishes are chosen in a studio but judged on site. The table pairs the installation contexts we see most with the finish that performs best in each.
| Site type | Recommended finish | Why | Maintenance expectation |
|---|---|---|---|
| Indoor dark gallery | Mirror-polished | Reflective skin multiplies available light; the controlled environment removes water and chloride risk | Dust and print clean-down a few times a year; occasional re-polish on touch zones |
| Indoor bright lobby | Satin brushed, hairline on feature faces | Daylight or downlighting on mirror produces glare and hotspot banding; a directional grain softens the same light | Wipe-down as normal housekeeping; local re-graining of scuffs on site |
| Coastal outdoor | Bead-blasted, in 316-grade steel | Chlorides attack polished grain boundaries first; matte surface plus molybdenum-bearing alloy resist salt | Fresh-water rinse on a set cycle, periodic sealant renewal, no polishing |
| Public plaza | Bead-blasted, satin only above reach height | Contact, abrasion and graffiti risk exceed what a fine sheen is worth; matte absorbs everyday wear | Wash-downs, plus occasional re-blasting of low panels |
| Pool or constant-water feature | Satin or bead-blasted; mirror only above the splash line, in 316 or better | Constant water contact carries chlorides and minerals to every surface; spots etch mirror within weeks | Highest of all — scheduled seal inspection, splash-zone cleaning, periodic refinishing |
Where a site involves constant water contact, the finish question is inseparable from the alloy question. Our hotel water wall is a case in point: the specification that survives a wet environment combines a water-tolerant finish with a molybdenum-bearing grade, explained in our comparison of 316 versus 304 stainless for sculpture.
How to specify a finish so you get what you paid for
Most finish disputes are not caused by a shop doing bad work, but by a specification that named a finish without defining it, so two parties left with different pictures of the same word. Put the following in writing before fabrication starts:
- Name the finish and code it. Write a plain-English description and a recognised classification — for example mirror, 8K / No. 8 equivalent, satin brushed, grain vertical, or bead-blasted, matte, target Ra 1.2 µm. On the older industry scale this may appear as 2D, 4D or 8B, but never let the code stand alone.
- Agree a target gloss reading or a physical sample. Insist on a signed-off metal coupon of the same alloy and thickness, and record the gloss reading at the agreed angle. A sample converts “brushed” from an opinion into a reference object.
- State how welds and seams are hidden. Say which joints must be fully blended, how blending is done in each finish, and which faces are class-A visible surfaces.
- Specify the protective sealant. Name the product, or at least the class — an inert nano-coating for the splash zone, or a wax system for a sheltered satin piece — and say whether it is applied at the factory, on site, or both.
- Attach a maintenance plan. Include cleaning frequency, approved agents (never chlorinated or abrasive cleaners, never steel wool), the re-sealing interval and who carries it out.
- Write the remedy if the delivered surface does not match. Include an acceptance step comparing delivered panels against the approved sample under raking light, and a written remedy — re-finishing or replacement of the affected panel at the supplier’s cost — if it fails.
The finish is agreed at the same sign-off gate as geometry, alloy and anchor design, which is how our own sculpture making process sequences it: sample approval first, production second. A supplier’s willingness to put a finish in writing also says a lot about how they work — see the checklist in our guide to choosing a stainless steel sculpture manufacturer.
Have a project in mind?
Mirror, satin, hairline and bead-blasted are four answers to one question, and the right one depends on where the piece will stand, how it will be lit and how much care it will realistically receive. Send us the location, the approximate scale and the look you are after, and we will come back with a recommended finish, the alloy that supports it and an honest view of the maintenance it implies. Request a quotation for your stainless steel sculpture and we will specify the surface as carefully as the form.
The uncomfortable truth about shipping custom sculpture is that for two to six weeks you cannot see it. A welded figure leaves the workshop wrapped in foam and screwed into a crate, and the next time anyone inspects the mirror finish it is on another continent. You cannot watch the crane, you cannot check the strap, and you cannot tell the dock worker that the top edge scratches if the crate is dragged face-down. By the time the photographs arrive, the decisions that mattered were made months earlier, in a packing list and an insurance clause you signed without reading twice. This article is about the crate and the paperwork, not the sculpture — because that is where international sculpture shipping is actually won or lost.
Why shipping custom sculpture is different from furniture shipping
Freight companies move a great deal of furniture, and their default assumptions are built for it: flat panels, stackable boxes, replaceable units, and a scratch nobody will notice under a table. A stainless steel sculpture breaks every one of those assumptions, and the moment you accept the furniture playbook you have accepted the furniture risk.
- Irregular dimensions. A sculpture is not a box. Arms, wings and cantilevers occupy space cargo planners expect to be empty, so the piece cannot be stacked, palletised or nested against anything else in the container.
- Single-piece risk. There is no second unit on the shelf. If the head cracks or the base tears loose, nobody ships a replacement next week — the commission restarts at the fabrication stage.
- A surface that turns on the way. A polished or brushed stainless finish is a damage amplifier: a mark invisible on a painted steel beam reads as a bruise on a reflective surface, measured by reflected light rather than direct inspection.
- The sculpture often cannot be re-packed. The crate that left the workshop holds its geometry. Once a piece is pulled out at a port for inspection, the foam blocks rarely seat correctly again, and a re-crated sculpture travels worse than it did the first time.
Because the buyer’s hands are tied during transit, every scrap of leverage sits in documents written beforehand: the crate specification, the declared value, the named receiver at the port, and the instruction to photograph on arrival. The destination shapes the route as much as distance does — browsing our sculpture applications by setting shows whether a piece is travelling to a plaza, a fountain, a facade or an interior, and each destination implies a different truck, crane and access plan. The same upstream logic governs fabrication, as our sculpture commissioning process sets out.
Road, air or sea: choosing the lane for shipping custom sculpture
The instinct is to pick the lane by distance. The correct method is to pick it by dimension and finish first, then by deadline, and only then by distance. A 900 kg polished sphere and a 40 kg wall relief can leave the same workshop and travel by completely different means.
Road
Inland haulage and short cross-border runs are the lowest-risk lane for the surface, because the sculpture never leaves the crate for a modal transfer and rarely sits in an open yard. The trade-off is practicality: anything above roughly 2.5 m wide needs permits, escort vehicles and night-only movement in many jurisdictions. Road is the right answer for domestic installation and for the first and last legs of every other lane.
Air freight
Air is fast, expensive and dimensionally unforgiving. Aircraft pallets impose hard height and width limits, and the piece is transferred by machinery the shipper does not control. Air makes sense for small and mid-scale pieces with a fixed unveiling date, or for a replacement element needed in days. It rarely makes sense above a few hundred kilograms, and it is where unprotected polished surfaces suffer most, because air cargo handling is fast by design.
Sea freight
Sea is the default for large pieces: a full container load gives you a sealed, dry space nobody re-stacks. The risks are humidity, duration and condensation inside the container. Anything over roughly 2.5 m needs a flat rack or open-top container, which removes the roof but keeps the crate bolted down. Sea is slowest — four to eight weeks door to door on many lanes — and it is the lane where desiccant, ventilation and moisture barriers stop being optional.
Two technical facts compress the decision further. Dimensional weight rather than physical weight often governs cost and lane feasibility, which is why the structural realities in our guide to wind loading on large stainless sculptures also drive freight planning. And the material changes how much visible marking you can tolerate: cast bronze ages its marks into a patina, as we explain in stainless steel versus bronze, while stainless keeps every scratch visible.
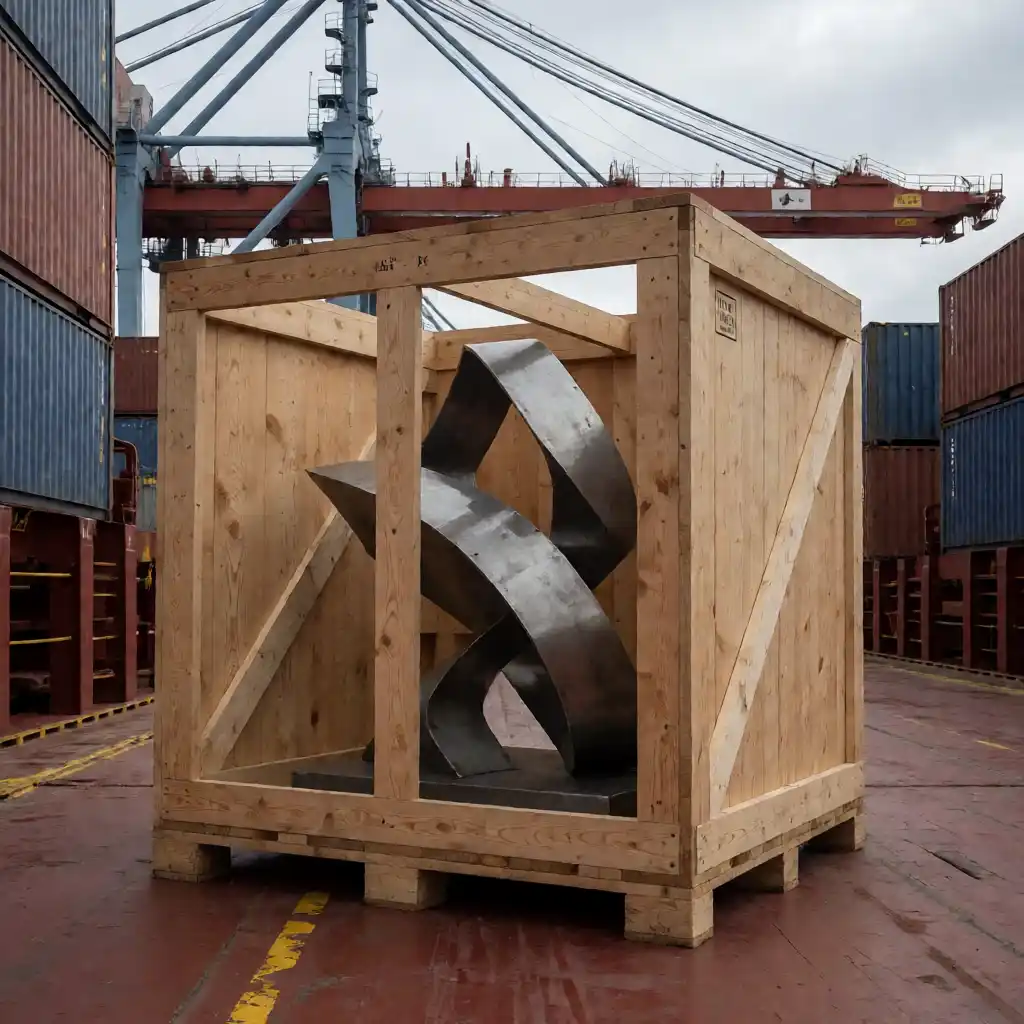
Crating: where most surface damage actually happens
At this stage the crate is the product. The sculpture is a passenger, and its finish survives or fails on decisions invisible from outside the box. A crate that is right saves the finish; one that is wrong costs more than the sculpture, because remediation means re-polishing on site or flying a fabricator out at short notice.
- Internal protection against the finish. Mirror or brushed surfaces get acid-free foam, felt or clean moving blankets applied directly, taped to the sculpture and never to the finish. No strapping runs bare across a polished face.
- A rigid internal frame. Blocks, saddles and brackets are built to the actual geometry so the piece cannot shift, rotate or rock. Movement of a few centimetres over four thousand kilometres produces most deep scratches.
- Ventilation and desiccant for sea. A sealed crate on a ship sweats on the inside. Vent ports, moisture barriers and calculated desiccant keep condensation off the steel and prevent the white blooming that ruins a polished surface.
- Corner protection. External timber battening on all eight corners absorbs forklift and container-edge impacts so a shock is spent on the crate rather than transferred to the sculpture.
- A loadable base. The crate must be liftable from underneath, with skids and a forklift pocket that let machinery handle it without touching the sculpture or relying on the sides for support.
Ask for photographs of the assembled crate before it is closed, and for the external dimensions and gross weight in writing. Those two numbers feed every freight quote and every customs document that follows.
Freight insurance, and what it will and will not cover
Freight insurance is not a formality, and the difference between a policy that pays and one that argues is usually a single sentence. Most sculpture losses are finish claims, not total losses, and insurers treat them with far more suspicion.
- Insure at declared value, not a percentage of invoice. The cheap-looking option covers a fraction of the invoice value. It reads like a discount until the claim settles at that fraction, and the shortfall comes out of the buyer’s pocket.
- All-Risks is the baseline. Named-peril coverage excludes whatever nobody thought to name, which in sculpture logistics is usually handling damage.
- The claim window is short. Visible damage claims typically must be opened within 24 to 48 hours of receipt, with photographs taken by the receiver at the dock — before the crate is opened further, before the sculpture is moved, and before anyone signs a clean delivery note.
- Inadequate packing and pre-existing conditions are standard refusals. Insurers decline claims where the packing is judged insufficient for the declared value, where the loss is described as cosmetic wear, or where the receiver signed without noting damage.
Read the exclusions page before the crate is loaded. The most valuable line in the policy is the instruction that the receiver photographs the crate and the sculpture on arrival and reports any visible mark immediately.
Customs clearance for artwork and metal sculpture
Customs is where a well-run shipment turns into a two-week hold, and where a hurried classification decision costs the buyer real money. Everything here should be agreed in writing with the importer before the sculpture moves.
HS classification
A stainless steel sculpture is a strong candidate for the 9704 art classification rather than a generic article-of-metal heading. The distinction is not academic: art categories frequently attract zero or reduced duty, while generic metal classifications can attract meaningful percentage rates. The sculpture has to genuinely qualify as an original work, which is why authorship paperwork matters. A wrong HS code costs money at the port and delays the whole installation.
Certificates of origin
Origin documentation supports preferential duty treatment under free trade agreements and proves where the piece was fabricated. It must match the invoice, the packing list and the HS code exactly.
Customs value documentation
Customs assesses goods on value, not weight. The commercial invoice, the contract and, where relevant, a statement of value or certificate of authorship must tell one consistent story. Inconsistency between documents is the most common trigger for a physical inspection.
Import VAT and duty by region
Duty rates and import VAT vary widely by destination, and VAT is normally payable by the importer at the point of entry even where duty is zero. Confirm the landed cost before shipping, and never assume the zero-duty outcome that applies in another country applies here.
Documents that must travel with the sculpture
Documents travel with the crate, not in an email nobody opens at the port. A missing document is a week of delay, demurrage charges and, in the worst case, a sculpture sitting in the open while someone chases a signature.
- Commercial invoice — description, quantity, unit value, currency, Incoterm and the names of both parties.
- Packing list — exact external dimensions, gross and net weight, crate count and contents, itemised per crate.
- Certificate of origin — issued by the competent authority for the manufacturing country.
- Insurance certificate — naming the shipment, the declared value and the consignee as beneficiary.
- Engineering or weight certificate — lifting points, centre of gravity and total mass, which the receiving crane crew needs before they rig anything.
- Certificate of authorship or statement of value — frequently required to support art-category classification.
The install day: the last mile that decides everything
A sculpture can arrive in perfect condition and still be ruined in the final two hours. Crane day is the highest-consequence, lowest-supervision moment of the project, and it rewards an hour of planning far more than improvisation on the day.
- Access survey before the truck arrives. Measure the gate, the ramp, the overhead cables and the turning circle, and confirm the crane’s outrigger spread and the surface it will stand on.
- Protection during the lift. Slings padded, no bare chain on a polished surface, no wrap that can slip, and a tag line so the piece never swings into a wall.
- Base setting and alignment. Anchor bolts, levelling, orientation to the main approach sightline, and drainage checked on water features before the crane is released.
- A final walk-around with the receiver. Photograph every face and sign a joint condition report while the crane and crew are still on site, not the following morning.
Large public work shows the pattern clearly: a landmark delivered to an airport gateway installation faces night-only lifting windows and security escort rules, while a commercial plaza delivery has to work around trading tenants and live footfall. Both are normal sculpture installations, and both are won on the day’s rehearsal, not on the crane.
A shipping cost and timeline table
The ranges below are typical for a mid to large stainless steel commission of one to three cubic metres and several hundred kilograms. Treat them as planning ranges, not quotes.
| Lane | Typical transit | Surface risk | Insurance expectation | Biggest delay risk |
|---|---|---|---|---|
| Inland road | 1–7 days | Low | Standard named-peril cover is usually enough | Oversize permits and escort approvals |
| Cross-border road | 3–10 days | Low to moderate | Add border dwell cover | Customs inspection at the land border |
| Air freight | 3–7 days door to door | Moderate to high if unprotected | All-Risks at declared value, tight claim window | Dimensional limits, re-palletising and handling damage |
| Sea freight (FCL) | 25–55 days door to door | Low in a sealed container if crated well | All-Risks plus humidity and condensation clauses | Port congestion, HS code holds and clearance paperwork |
A pre-shipment checklist
Work through this list before the crate is closed. Every item is cheap to satisfy now and expensive to fix afterwards.
- Photograph the surface condition from all sides, with a dated file, before the sculpture is wrapped.
- Inspect the assembled crate against the specification and photograph the internal blocking.
- Bind insurance at declared value, with All-Risks wording and the exclusions read.
- Agree the HS code in writing with the importer and confirm duty and VAT treatment.
- Complete the customs value documentation so invoice, packing list and origin certificate agree exactly.
- Confirm the receiver’s access, crane booking and lifting window in writing, not by phone call.
- Name a single contact at the receiving port who is authorised to accept and to open a claim.
- Write the photograph-and-report instruction into the contract and into the delivery note the receiver signs.
Have a project in mind?
If you are planning shipping custom sculpture across a border, the cheapest hour you will ever spend is the one before the crate is closed. Send us the drawing, the destination and the deadline, and we will come back with a crate specification, a recommended lane and the documentation list for your importing country — so the only surprise on arrival is how good the finish looks. Request a quote for your stainless steel sculpture project and start the paperwork early.
Once you have decided that a stainless steel water feature is the right object for a space — rather than a jet fountain — the conversation changes completely. You are no longer choosing a look. You are specifying a small hydraulic system dressed in polished steel. The visible part, the sheet of water sliding over a bright rim, is roughly ten per cent of the work. The other ninety per cent is a pump station, a filtration loop, an overflow channel and a freeze strategy, and those decide whether the feature is still running quietly in year five or has become a monthly complaint. This article covers that engineering.
Stainless steel water feature engineering is not optional
A sculptural water feature is two projects sharing one footprint. The first is the steel form: the pan, the rim, the wall, the shell. The second is the hydraulic package that feeds it, cleans it and drains it. Clients spend most of their attention on the first and most of their budget on the second, usually after installation has already started.
If you have not yet settled the decision between a still reflective water feature and a moving jet fountain, that comparison is covered separately in our guide to choosing between a stainless water feature and a fountain. From here on we assume a pan, a wall or a rim overflow has been chosen, and the question is how to make it work.
Three things go wrong repeatedly, and all three are engineering rather than aesthetics:
- The pump is sized on volume, not head. The result is a weak, dribbling film over an expensive rim.
- Circulation is treated as an afterthought. A beautiful basin turns green within a month.
- Freeze protection is left to the maintenance contractor. The first hard winter cracks a lining that cost more than the pump station.
The steel itself has a known and predictable life. The fabrication process for a stainless steel sculpture already controls wall thickness, weld quality and passivation, and those determine whether the metal resists corrosion for twenty years. The hydraulics are less forgiving because they are invisible and because water finds every mistake.
Pump sizing: the number that gets wrong most often
Pump selection is the single most common place for a water feature to be quietly ruined. It is also the cheapest thing to get right, because it is decided on paper before anything is bought.
Flow rate and head are two different numbers
Flow rate is the volume you need, in litres per minute. Head is the total resistance the pump must overcome to deliver that volume, measured in metres. A pump is not chosen for flow alone — it is chosen for flow at a given head. Every pump has a curve, and moving from 2 metres of head to 4 metres can halve the delivered flow.
Head has two parts: static lift, the vertical distance from the water surface in the sump to the discharge point, and friction loss — pipe length, elbows, valves and above all the filter. A pressurised cartridge filter typically adds 0.15 to 0.25 bar, roughly 1.5 to 2.5 metres of head on its own. Designers who ignore that number are the reason a rim overflow arrives on site with a trickle.
What under-sizing and over-sizing actually cost
- Under-sized: the water film breaks into fingers, the rim develops dry patches, and the fix is a new pump plus possible pipe resizing.
- Over-sized: audible pump whine through adjacent rooms, cavitation that eats the impeller, constant energy cost, and water thrown clear off the rim in wind.
There is a correct band, and the way to hit it is to calculate both flow and head, then pick a pump whose curve delivers the required flow at roughly 80 per cent of its maximum head.
A worked example: a pan feeding a rim overflow
Take a 3-metre circular pan with a waterfall lip. A clean, unbroken sheet needs 40 to 60 litres per minute per metre of lip — call it 50, so the lip demands 150 L/min. Add vertical lift of 0.8 m, 12 m of pipe and four elbows at roughly 0.9 m of friction, plus 2 m for the filter. Total head is about 3.7 m. The pump must therefore deliver 150 L/min at 3.7 m, not at zero head — a larger and more expensive unit than a volume-only calculation suggests. Our pool water feature pan project and the hotel water wall installation are both sized on exactly this basis.
Filtration and circulation: keeping the water clean
Water clarity is governed by circulation, not by how much water the feature holds. A 200-litre basin turned over four times an hour stays clearer than a 2,000-litre basin turned over once every six hours, because turnover keeps particles suspended long enough to reach the filter and denies algae a settling zone.
The practical rule is a full turnover of the feature volume every one to two hours for a decorative feature, and more often where the water is shallow and sunlit. Circulation is designed with a skimmer or surface draw so floating debris leaves the basin instead of decorating it.
Two filter types cover most projects:
- Cartridge filters — fine filtration, low pressure drop when clean, cheap to replace, but they load up quickly and must be cleaned weekly in season.
- Pressure (media) filters — larger dirt-holding capacity, backwashed in place, better for heavily loaded or public features, but heavier and they add meaningful head loss.
The biological reality is blunt: untreated water in an outdoor feature grows visible algae in two to four weeks regardless of size or finish. Specifying a filter, a UV unit or a dosing system is not a luxury, it is the difference between a water feature and a green tub.
The overflow edge: where the engineering shows
The rim is the one part of a water feature that everybody looks at, and it is the part most often executed badly. A rim is not simply a sharpened edge with water poured over it. It is a hydraulic detail with four separate jobs: forming the sheet, catching the water, returning it, and staying straight.
The drip lip, the return channel and the sheet
Below the visible lip there must be an underside drip edge that breaks the water cleanly and stops it clinging back to the fascia. Below that sits a return channel sized to carry the full overflow volume even when the film is thicker than designed, with a fall of at least 1:100 so it never ponds. The water sheet itself is a function of pump pressure and lip geometry: too little pressure and the sheet fingers into separate streams, too much and it detaches from the lip and curls.
Straightness is a construction issue, not a design one. A long rim welded from segments will bow under the weight of water alone, so the lip is set on a jigged straight edge, supported at close centres, and checked after fill, not before. The resort pool fountain project shows what a continuous rim looks like when the lip and channel are made as one assembly rather than assembled on site.
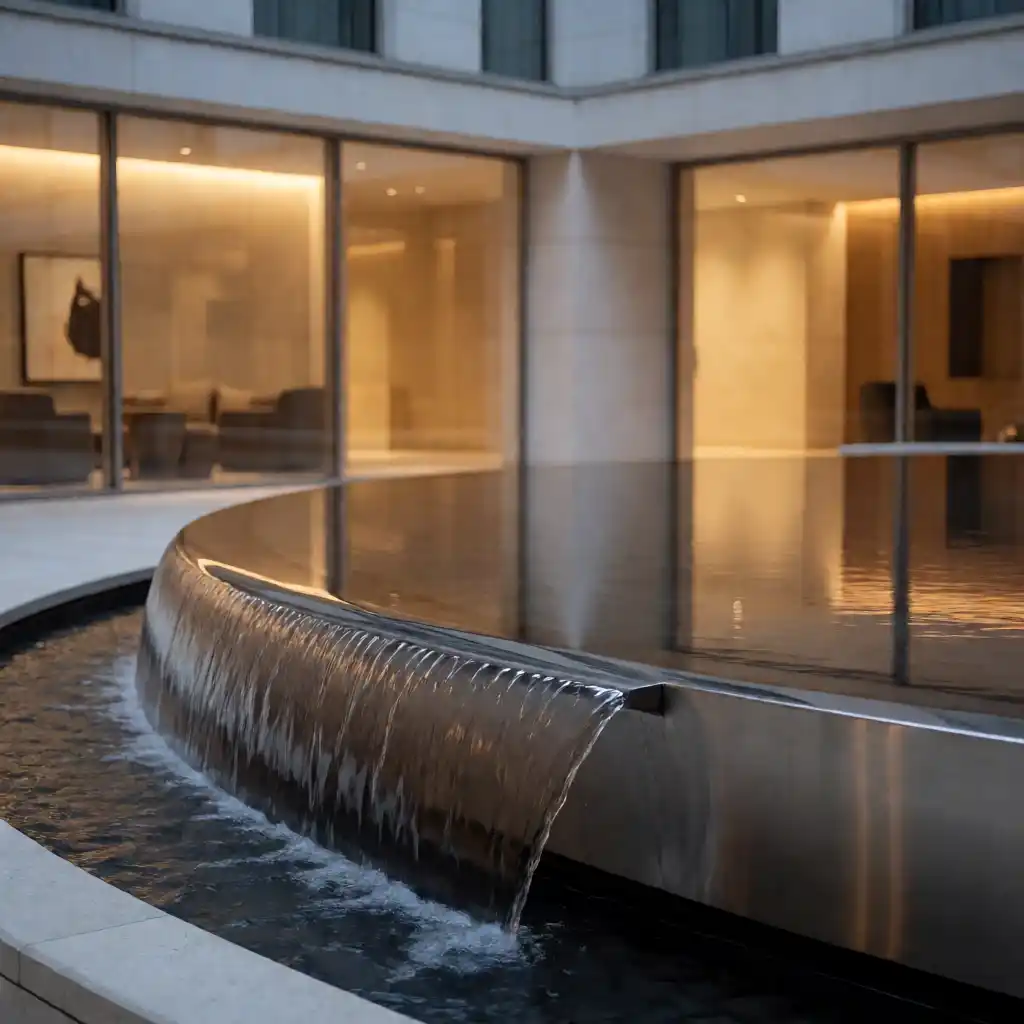
Above all, the rim joint must be sealed and welded, not gasketed. Water under pressure always finds a gasket that was adequate on the drawing. A fully welded, passivated rim seam costs a little more in fabrication and removes the most common leak path in the whole assembly — which matters far more than adding another half-millimetre of steel thickness.
Wind spray and the surrounding surfaces
Wind is the variable that turns a two-millimetre overflow into a two-metre spray zone. The physics is simple: the falling sheet has almost no mass, so a crosswind of 5 m/s carries droplets well beyond the basin, and a 10 m/s gust can strip the sheet entirely off the rim on the windward side.
Every water feature specification should carry a wind spray radius — the horizontal distance from the rim that will be wetted at the site’s design wind speed. It is a real number, measured or modelled, and it should appear in the drawings so the landscape architect can plan around it.
Practical answers, in order of preference:
- Reduce flow on the windward side, or zone the rim so the exposed lip runs at lower volume while the sheltered lip carries the full sheet.
- Baffle or screen the exposed side with a glass, steel or planting screen at least the height of the fall.
- Drip trays beneath the likely wet zone, with drainage, for paving and stone.
- Sacrificial barriers — gravel margins, tolerant planting or replaceable stone — where hard finishes or plantings will otherwise stain with mineral deposits.
A courtyard that is sheltered on three sides behaves completely differently from a rooftop or an exposed plaza. The hotel courtyard water feature sits in a semi-enclosed space where spray is measured in centimetres, while the same rim on a rooftop would need screening and reduced flow.
Freeze protection for a stainless steel water feature
In cold climates, freeze damage destroys more water features than corrosion ever will. Water expands by about nine per cent when it turns to ice, and that expansion will split a pump body, crack a welded lining and shear pipework long before the steel shows any sign of rust. Freezing is a structural event, not a cosmetic one.
Protection is chosen by climate, and there are three levels:
- Low-flow recirculation — keeping the pump running through cold nights so moving water does not freeze. Adequate for occasional light frosts.
- Heated pump chambers or trace heating — insulated housings with thermostatically controlled heating cable on exposed pipework, for sites that drop below freezing intermittently.
- Full drain-down systems — sloped pipework, low-point drains and isolation valves so the entire system can be emptied and left dry for the season.
Be honest about the design temperature. A site that regularly sits below −5 °C needs a drain-down design, not a heated one. Heating an outdoor basin through a continental winter burns more energy than the feature is worth, and one power failure at the wrong moment undoes the whole strategy. Water held in constant contact with steel also raises the stakes on alloy choice: standing water in a recirculating system justifies marine-grade 316 rather than 304 stainless, especially where chlorides or coastal air are present.
A water feature engineering checklist
Use this table during design review. Every row is a decision that costs a fraction of its eventual repair if it is made before the concrete is poured.
| System | Specification | Failure mode | Cost to fix later |
|---|---|---|---|
| Pump station | Flow and head calculated together; pump curve delivers duty flow at 80% of max head; sump sized for full basin volume plus surge | Weak film, dry patches on the rim, pump cavitation and impeller wear | High — new pump, possible pipe resizing, drain and refill |
| Filtration | Full turnover every 1–2 hours; cartridge or pressure filter sized to feature volume; surface skimmer; UV or dosing where sunlit | Algae within 2–4 weeks, cloudy water, stained rim and paving | Medium — retrofit filtration and extra sump space |
| Overflow edge | Drip edge plus return channel at 1:100 fall, jigged straight, fully welded and passivated rim joint | Leaks at the rim seam, water clinging to fascia, bowing under load | Very high — cutting and re-welding an installed rim |
| Wind protection | Wind spray radius stated in the drawings; windward flow reduction or baffle; drip trays with drainage | Water loss, saturated paving, mineral staining, unhappy neighbours | Medium — retrofitted screens and drainage are visible after the fact |
| Freeze protection | Climate-appropriate strategy: low-flow recirculation, trace heating, or full drain-down with low-point drains | Split pump bodies, cracked lining, sheared pipework in the first hard winter | Very high — structural repairs to the steel itself |
| Access for maintenance | Removable grille over the sump, isolating valves, filter reachable without draining the feature, pump liftable by two people | Every routine task becomes a major intervention; filters get skipped | High — re-cutting the surround or installing an access hatch |
Maintenance that keeps it running
Water features fail slowly before they fail loudly. A circulation loop that is cleaned on a schedule runs for years without drama; the same loop left alone becomes a green basin, then a seized pump, then a permanently stained rim.
- Weekly, in season: clean the filter basket and skimmer, check the water level, and look at the sheet over the rim for dry patches or fingering.
- Monthly: backwash the pressure filter or replace the cartridge element, and check the dosing or UV system.
- Seasonally: inspect the pump for noise, vibration and flow loss; check all valves and isolation points; re-check the water chemistry balance.
- Annually: realign the lip and the return channel, clear any mineral scale from the rim edge, and verify the spray pattern is still even across the full width.
- Once a year, at the end of the season: drain the system down, inspect the internal surface of the stainless lining for pitting or staining, and confirm the low-point drains are clear before refilling.
The surface side of the same routine — cleaning, polishing and protecting the visible steel — is covered in our outdoor stainless steel sculpture maintenance guide. Together, the hydraulic checks and the surface care are what keep a water feature looking and behaving like new.
Have a project in mind?
Water feature engineering is where the quote is made or lost. The pan and the rim are visible; the pump station, filtration loop, overflow channel and freeze strategy are what determine the real cost and the real lifespan of the piece. That is why we price from the hydraulic design rather than the drawing alone — the same silhouette can differ substantially once flow, head and climate are resolved. Our stainless steel sculpture cost guide explains how those variables move a budget. If you have a site, a basin size and a rough idea of the effect you want, send them across and we will come back with a hydraulic design, a bill of materials and an indicative budget band. Request a quote for your stainless steel water feature and we will take it from there.
Ask most fabricators whether to use corten or stainless and you will get the cheaper answer first, because corten genuinely is cheaper. Corten is the more dramatic-looking option too: within two years it turns the deep rust-orange that clients photograph and architects keep specifying. What the buyer is usually not told is what corten costs later — the staining, the cleaning, the surfaces around it that were never budgeted for a rust halo. This guide walks through the stainless steel vs corten decision the way we actually make it with clients: material science first, then honest cost, then the weathering and runoff behaviour that decides most projects in the end. Corten is the right answer more often than stainless-only fabricators admit. It is also the wrong answer in a handful of situations where nobody warns the client until the plaza is already stained.
Stainless steel vs corten: what each material actually is
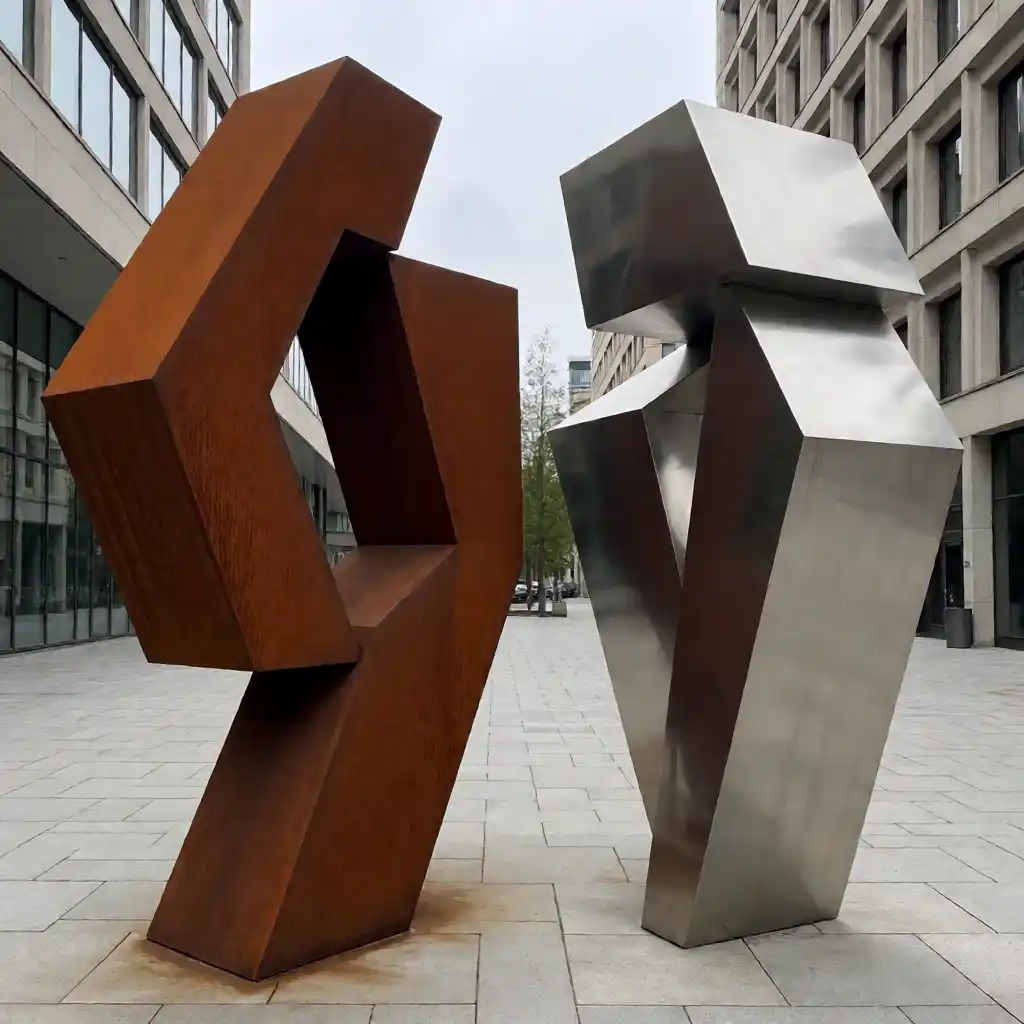
Corten is a family of low-alloy weathering steels — the name is a Cor-Ten trademark, and the relevant grades are SA 524 in the US and 409-type weathering steel in the EU. The alloy is deliberately designed to corrode, but only to a point. As the surface oxidises, the outer layer forms dense iron oxides that slow further corrosion; the result is a stable, rust-coloured patina that protects the steel underneath. The critical detail that decides site planning: that layer is not instant and it is not passive. It needs repeated wet-and-dry cycles to build and stabilise, which is why corten behaves very differently in a rainy coastal city than under a dry awning.
Stainless steel works on the opposite principle. Grades 304 and 316 resist corrosion because of chromium in the alloy — at least 10.5% — which forms an invisible passive oxide film over the surface. If the film is scratched it re-forms immediately in the presence of oxygen. 316 adds molybdenum, which is what makes it hold up in chlorides: salt spray, swimming pools, de-icing salt. In normal service, neither grade rusts. You can browse the full range of finishes and grades we work in on our materials and finishes page.
- Corten (SA 524 / 409): corrodes on purpose, forms a stable patina, needs water and time to develop, and sheds iron oxide as runoff.
- Stainless 304: passive chromium layer, no rust in normal outdoor service, good for most inland sites.
- Stainless 316: 304 plus molybdenum, specified where chlorides are present — coast, pools, salted roads.
Stainless steel vs corten: the cost comparison, honestly
On raw material, corten plate runs noticeably cheaper than 304 stainless sheet of comparable thickness, and the gap is wide enough to move a budget line. Fabrication cost splits the same direction. Cutting, welding and grinding a corten piece does not ruin the finish, because the finish is rust — the weld discolouration weathers into the same patina. On a mirror-polished stainless surface, every weld and every heat-affected zone has to be dressed and re-polished back to uniformity, which is slow, skilled work.
That combination is why corten became the default for large civic commissions. When a municipality has a fixed budget and a monumental scale to cover, corten buys more square metres of sculpture per dollar, and the rusted aesthetic reads as public, durable and contemporary. It is a rational specification, not a compromise.
Stainless comes back to parity — and sometimes past it — in three predictable places. First, a polished or brushed finish, where the surface treatment is the product and customers are paying for reflection and precision. Second, a marine or heavily salted site, where 304 would pit and the job has to move to 316, so the comparison becomes corten versus 316 rather than corten versus 304. Third, and most often overlooked, a client who simply will not accept rust runoff — at which point the cheaper material creates a maintenance liability that erases the saving. For a wider view of how we run these comparisons across materials, our stainless steel vs bronze comparison follows the same reasoning.
How they weather over time
Cost decides the shortlist; weathering decides the winner over the life of the piece. The two materials look their worst and their best at completely different times, and the difference is most obvious in the first two years and again when winter salt arrives.
First two years
Corten is at its most troublesome here. Freshly installed weathering steel runs: rain carries iron oxide off the surface and deposits it wherever the water lands. It looks uneven for months and only gradually settles into the uniform patina clients picture. Stainless does the opposite — 304 arrives dull from the mill or the polishing shop and slowly brightens or holds its finish as the passive layer stabilises, with no discharge at all. Our geometric stainless sculpture in a park setting is a good example of a piece that looked settled from installation day.
Year five
By year five the corten patina has usually reached its characteristic dark orange-brown and stabilised, assuming the piece gets regular wet-dry cycles. Where it does not — under a canopy, in a desert, in a covered atrium — the layer stays patchy and keeps shedding. Stainless at year five looks essentially as it did at year one, apart from normal atmospheric soiling that a wash removes.
Winter with de-icing salt
This is where the split is sharpest. De-icing salt accelerates corten’s corrosion cycles, so runoff gets heavier and staining around the base worse in exactly the months when maintenance crews are least available. Salt is also the single strongest argument for specifying 316 instead of 304 stainless on any northern or coastal site with road salt nearby.
The runoff problem: corten stains everything around it
The most common corten complaint has nothing to do with the sculpture and everything to do with what surrounds it. Iron oxide carried in rainwater stains stone, concrete, glass, painted render and adjacent planting. On pale limestone paving the marks are obvious within one season; on glass they are permanent unless cleaned regularly, and on painted surfaces they can require repainting rather than washing. Nearby plantings suffer too — rust deposits on foliage and staining at the drip line.
None of this is unfixable, but all of it costs money and has to be designed in from the start.
- Drip trays and concealed gutters: capture runoff at the base and route it away from paving, retaining walls and planting beds.
- Sacrificial barrier strips: a replaceable band of stone or metal at the water line that takes the staining so the primary surface does not.
- Runoff-suppressing coatings: clear treatments applied to the corten that reduce oxide release while still allowing the patina to form. They need reapplication on a maintenance cycle.
- Cleaning the stained surfaces: the fallback. Stained stone and concrete can be cleaned, but this is a recurring cost that many clients never budget for.
Some clients reject corten on this basis alone, and they are not being unreasonable. A public plaza with white stone paving, glass facades and a maintenance contract measured in visits per month is a genuinely bad home for weathering steel — however good the render looked in the concept images.
Maintenance and upkeep
Both materials need maintenance. The useful comparison is effort, not existence — a common mistake is to present stainless as maintenance-free and corten as a lifetime commitment. Neither is quite true.
Corten needs the surface kept clean of debris and organic matter, especially leaves and soil at the base that hold moisture unevenly and cause patchy corrosion. If the patina layer is damaged — scratched back to bright metal, or drilled through — the affected area has to be allowed to re-weather, which is slow, or treated to blend it. Coatings, where specified, need reapplication on a known interval.
- Corten, annual: clear debris, inspect the base and water lines, check that drainage is still working.
- Corten, as required: treat damaged patina, reapply runoff-suppression coatings, clean stained adjacent surfaces.
- Stainless 304/316, annual: wash with fresh water and a mild detergent to remove atmospheric soiling; inspect for tea-staining around welds.
- Stainless, as required: re-passivate or re-polish high-visibility surfaces if a client wants the original finish restored after years of use.
In practice a stainless piece with a routine wash looks close to new for decades. A corten piece also lasts decades, but the maintenance attention is spread around it, not just on it.
Engineering and structural differences
The structural story follows directly from the corrosion behaviour. Corten has to corrode in order to protect itself, so there is a corrosion allowance built into the design: plate gauges are heavier to guarantee a sound section after decades of surface loss. That extra thickness is not free — it adds weight and requires heavier internal framing to carry it.
Stainless needs no corrosion allowance, so the material can be worked thinner for the same structural performance. That opens up finer, lighter forms: tight radii, thin edges, precise gaps. It also matters at height. On a tall piece, wind load governs the design far more than self-weight, and a lighter stainless section reduces both the lateral force the structure has to resist and the load the foundation has to carry. Thinner stainless can therefore be more efficient than thicker corten for the same visual mass — a point we cover in detail in our guide to wind loading on large stainless steel sculptures.
The trade-off is stiffness and fabrication complexity. Thin stainless plate moves more during welding and demands tighter quality control to avoid distortion. Corten’s heavier sections are more forgiving to fabricate and to erect, which is part of the reason it stays cost-competitive at monumental scale.
A decision table
The table below summarises the comparison at the level we use with clients. It is deliberately balanced: corten wins several rows outright, and the right column for your project may well be one of them.
| Material | Upfront cost | Weathering look | Runoff risk | Maintenance | Best sites | Worst sites | Typical use |
|---|---|---|---|---|---|---|---|
| Stainless 304 | Higher material cost; polishing labour dominates | Bright, stable, holds finish; no patina change | None | Annual wash; re-polish only if required | Inland plazas, parks, campuses, indoor atria | Coastline, pool decks, salt-spray zones | Landmarks, mirror-finish abstracts, corporate entrances |
| Stainless 316 | Highest material cost, typically 20–30% above 304 | Bright, stable, resistant to chlorides | None | Annual wash with fresh water; occasional passivation | Coastal promenades, marine sites, winter-salted cities, pools | Budget-driven civic work | Seafront sculpture, fountains, waterfront civic art |
| Corten (SA 524 / 409) | Lowest material and fabrication cost | Develops deep rust-orange patina over 1–2 years | High — stains stone, concrete, glass and paint | Annual debris clearing plus runoff management | Civic sites with generous setbacks, industrial and heritage contexts, rough landscaping | Glass-and-white-stone plazas, roof terraces, indoor spaces, seating edges | Large monumental work, wayfinding markers, architectural screens |
When to choose corten, and when not to
Strip away the marketing and the decision usually comes down to three inputs: budget, aesthetic direction and what is physically next to the piece.
- Corten wins when the budget is civic and fixed and you need maximum sculptural coverage per dollar.
- Corten wins when the work is large-scale and monumental, where heavier sections are an advantage rather than a cost.
- Corten wins when the brief genuinely calls for an industrial, rusted or weathered aesthetic — that is what the material does best.
- Corten wins when the surroundings are tolerant: gravel, rough planting, generous setbacks and no pale paving or glass within splash reach.
- Stainless wins when the site is coastal or salt-exposed, where 316 avoids pitting entirely.
- Stainless wins when pools or water features are involved and chlorides are in the air.
- Stainless wins when the plaza or facade is stone, glass or pale concrete that cannot be allowed to stain.
- Stainless wins when the client has specified a modern polished or brushed look, or the piece is indoors.
- Stainless wins when tight tolerances and fine detail are part of the design intent.
Both directions have live references on our site. The corten public art entryway shows how well weathering steel reads at an entrance scale, while the commercial plaza landmark is a stainless piece in a setting where runoff staining would have been unacceptable.
How to specify it so nothing surprises you
Most corten disappointments are specification failures, not material failures. Work through this list before the order is placed.
- Name the grade and the standard. Write “SA 524” or “409-type weathering steel” into the specification for corten, and “304” or “316” for stainless. “Stainless steel” alone is not a specification, and neither is “corten” as a brand shorthand.
- Decide whether the patina is pre-formed or weathered on site. Pre-weathering at the yard gives the client the finished colour before installation; weathering on site takes one to two years and produces visible running during that period. State which one you are buying.
- State whether a runoff treatment is required. If paving, glass or painted surfaces are within splash reach, specify the drip tray, barrier strip or suppression coating explicitly, and identify who installs and maintains each.
- Get a written surface-protection clause for adjacent materials. This allocates responsibility for cleaning or replacing stained stone, glass and paint, and it is the single clause that prevents most post-installation disputes.
- Sign an honest maintenance plan before install. Annual debris clearing and inspection for corten; annual washing for stainless; plus the specific interval for any coating that was applied.
Have a project in mind?
If you are weighing stainless steel vs corten for a specific site, the fastest way to a clear answer is to send us the location, the scale and the surfaces nearby — those three facts usually settle it. We will tell you honestly which material we would specify, including when the answer is the cheaper one, and what the runoff and maintenance implications are before you commit. Request a quote and we will come back with a material recommendation and a cost range for your project.
Commissioning a large stainless steel piece is not a purchase — it is a project you hand to someone else and wait for. You approve a render, pay a deposit, and then the object exists in a workshop you will probably never visit, made by people you will probably never meet. That gap is where almost every disappointing sculpture comes from. When a project goes wrong, the honest post-mortem rarely blames the welder: it blames the choice of a stainless steel sculpture manufacturer who could not engineer the piece, could not hold the finish, or could not put the promises in writing. This guide is the due diligence that has to happen before the first deposit, not after the crate is opened.
Why vendor selection is the real risk
On a commission, the buyer is absent during fabrication. You cannot stand over the jig, check the wall thickness of the tube being welded, or look at the polish under raking light at the moment it matters. Everything you will ever know about the piece is what you negotiated in advance and what arrives in the container. That makes the selection decision — not the drawing, not the price — the single highest-leverage choice in the project.
The risk is also misdiagnosed. Buyers worry that the sculpture will look bad in the rendering, but renderings are cheap and easy to iterate. The failures that actually hurt are administrative and structural:
- Delivered wrong. The grade is not what you specified, the wall thickness is lighter, the polished face has weld bloom or orange-peel distortion, or the mounting plate does not match the foundation drawing.
- Delivered late. A missed installation window means a crane booked for nothing, a plaza opening without its centrepiece, or a hotel that has to explain an empty plinth to guests.
- Cannot be installed. The piece arrives without lifting points, without an engineered base detail, or split into sections no truck or crane on site can handle.
None of those are fabrication accidents. They are selection failures — and they are decided long before steel is cut. The rest of this guide is a method for closing the information gap while you still have leverage.
The six criteria that actually matter in a stainless steel sculpture manufacturer
A shortlist built on price alone will fail. These are the six things worth scoring, in the order they tend to cause trouble. Use them as a scorecard before you ask for money to change hands.
| Criterion | What good looks like | What it protects you from |
|---|---|---|
| Engineering capability | Wind load, structural and foundation drawings issued as documents | A beautiful object that cannot legally or physically be installed |
| Finish quality | Consistent grain, no weld bloom, mirror or satin held across sections | A piece that looks patched in daylight |
| Grade discipline | 316 actually shipped when 316 is specified, with mill certificates | Premature corrosion in coastal or poolside settings |
| Communication cadence | Scheduled progress updates with photographs at fixed milestones | Discovering a problem at delivery |
| Delivery & installation record | Referenceable installed work, lifting plan, site team | A crate on the pavement and no plan |
| Warranty | Written coverage of finish and structure, with a remedy process | Paying twice for the same defect |
a. Engineering capability
The first question is whether the shop can produce engineering drawings at all — wind load calculations, internal structural framing, connection details, and a foundation or anchorage design that a local engineer of record can review. A shop that only draws the silhouette is a fabricator, not a sculpture manufacturer, and the difference shows up at permit stage. For a worked example of what this looks like on a large piece, see the wind loading calculations behind a large stainless sculpture, and the airport landmark project where the base detail was engineered alongside the artwork.
b. Finish quality and how they hold a polished surface
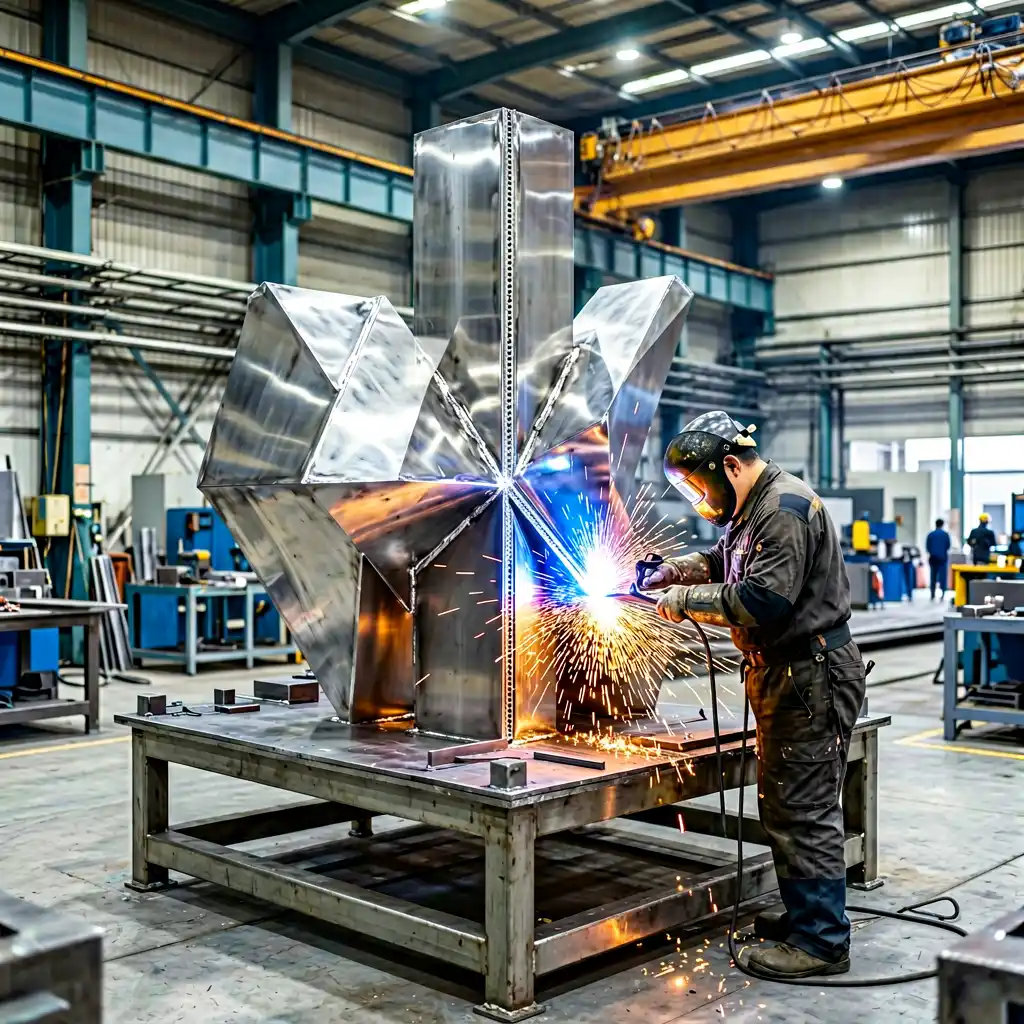
Finish is where small shops most often overpromise. Ask how the surface is prepared before polishing, how weld seams are dressed so they do not telegraph through the finish, and whether the polishing sequence is done after all fabrication — not before the last bracket is welded on. A mirror finish is a maintenance commitment as much as a manufacturing one; a satin or brushed finish hides far more site damage. Judge the shop on photographs of finished work in daylight, not in a spotlight.
c. Grade discipline
“Stainless” is not a specification. Grade 304 and grade 316 behave very differently outdoors, and the one that is right for a rooftop is not always right for a seafront. A serious shop will name the grade, name the wall thickness, and supply mill certificates. Our guide to 316 versus 304 stainless steel for outdoor sculpture explains where the line falls, and the coastal sculpture project shows a 316 marine-grade build in practice.
d. Communication cadence
Ask what you will receive and when: progress photographs at defined milestones, notice before a change, and a named person who owns the account. A shop that goes quiet between deposit and shipping is not a shop that will surprise you pleasantly. Cadence is the cheapest early-warning system you have.
e. Delivery and installation record
Delivery is part of the product. Ask for the lifting plan, the section weights, and the largest single piece that must move through the site. Then ask for a referenceable installation, and actually look at it. A shop with installed work you can visit has already solved the problems you are about to discover.
f. What the warranty covers
Read the warranty as a scope document. Does it cover finish defects, weld failure, and structural integrity? For how long, from what date, and what is the process when a claim is valid — repair, replacement, or credit? A one-line warranty is a marketing sentence, not a commitment.
Red flags to walk away from
Most bad outcomes were visible in the first two conversations. These are the signals that should stop a commission before the deposit, even when the price is attractive.
- No engineering drawings at all. If structural and foundation details are “not needed” or “handled on site”, the piece is being designed by the installer.
- A price that is 40% below the market. Steel is a commodity; nobody sells it below cost. A large gap is being recovered somewhere — thinner wall, cheaper grade, skipped finishing, or a base that you will pay to fix later.
- “We use stainless” with no grade or wall thickness specified. The absence of a number is the specification.
- No referenceable installed work. Photographs of workshop pieces are not installations. Ask for a site, a client, and a date — and expect all three.
- Resistance to a written spec. A shop that pushes back on a written specification sheet is telling you which parts of it they do not want to be held to.
- Deposit demands with no milestones. If payment is front-loaded without delivery or installation milestones, you are financing the project and carrying the risk.
Questions to ask a stainless steel sculpture manufacturer before you sign
Ten questions, each with the answer you should be listening for. If you cannot get the “want” answer in writing, that is data.
- “What grade and wall thickness will you use, and where will it be written?” Want: in the specification sheet, not only in an email thread.
- “Who signs off the engineering?” Want: a named engineer, a registration or stamp, and drawings you can forward to your local engineer of record.
- “Can you supply mill certificates for the steel?” Want: yes, with the delivery paperwork — traceability is standard practice for a serious shop.
- “How will weld seams be treated before finishing?” Want: a described dressing and polishing sequence, done after all fabrication is complete.
- “What finish will you sample, and can I approve it?” Want: a physical sample or a raking-light photograph approved before the final polish.
- “What happens if the finish is wrong on arrival?” Want: a remedy clause — repair, refinish, or replacement, with the shop carrying the cost and the logistics.
- “What is the largest section, and what lifting points will it have?” Want: numbers, plus a lifting and rigging plan for your site.
- “Which installations can I visit or call?” Want: two or three referenceable sites with contact names, not a photo gallery.
- “How and when will you update me during fabrication?” Want: a fixed cadence with progress photographs at named milestones.
- “What exactly does the warranty cover, for how long?” Want: structure and finish named explicitly, with a stated claim process.
A manufacturer comparison table
Not every project needs the same kind of shop. This is an honest map of the trade — not a ranking of any named company — so you can match the vendor type to the risk your project carries.
| Vendor type | Typical project size | Engineering drawings | Grade & wall-thickness spec | Finish hold | Warranty | Best fit |
|---|---|---|---|---|---|---|
| Small workshop | Under ~1.5 m, indoor or sheltered | Rarely issued; sometimes a sketch | Often stated verbally, rarely certified | Localised; difficult to hold across sections | Short or informal | Small decorative pieces, prototypes, tight budgets on low-risk sites |
| Mid-size fabricator | ~1.5–4 m, commercial interiors and plazas | Basic structural and base drawings | Grade and thickness written on the quote | Good on flat and simple forms | 1–2 years, defects-based | Hotel, retail and commercial pieces with moderate wind and access needs |
| Specialist architectural shop | Over ~4 m and/or exposed, coastal or public art | Full wind load, structural and foundation packages | Certified grade and wall thickness, with traceability | Controlled across complex double-curvature forms | Multi-year, structure and finish named | Landmarks, seafront and rooftop sites, permit-stage public projects |
Read the table as a risk ladder. The further up you go in scale and exposure, the more of the engineering, specification and warranty column you should refuse to do without — and the more you should expect the price to reflect it.
How to read a quote like a specifier
A good quote is a breakdown; a vague one is a single line. The difference is not administrative — it determines who owns the risk when something is missing. A well-itemised quote from a stainless steel sculpture manufacturer will separate:
- Design. Concept development and 3D modelling, including revisions.
- Engineering. Wind load, structural and foundation drawings, and any stamping or review.
- Fabrication. Steel grade, wall thickness, framing, welding and shop hours.
- Finish. Preparation, polishing or brushing, and any protective coating.
- Freight. Packaging, crating, sea or road freight, and insurance.
- Installation. Site team, rigging, lifting equipment and cranage.
- Contingency. A defined allowance for site conditions, or an explicit exclusion.
When a quote collapses all of that into “fabrication”, every item that is not mentioned becomes your problem. That is what a lump-sum quote actually is: a risk transfer into the buyer, priced below the real scope and settled later, on site, under time pressure. For a sense of how design, engineering, fabrication and finishing each move the number — and how a fully-itemised package comes together on a built project — see the plaza fountain project in our works archive.
The contract checklist
Whatever the quote looks like, these eight items should appear in the agreement before a deposit moves. If a shop resists any of them, that is your answer about fit. Our own commissioning process is built around this same sequence.
- Fixed dimensions and tolerances. Overall size, plus an acceptable deviation — a sculpture is a fabricated object, not a machined part.
- Grade and wall thickness. Named in the contract, with mill certificates on delivery.
- Finish specification. Mirror, satin or brushed, with the approved sample attached as an annex.
- Milestone payments. Tied to delivery and installation events, not to calendar dates alone.
- Engineering sign-off. Drawings issued for review, with a named engineer and stated standards.
- Remedy clause for finish defects. Defined process, cost bearer, and timeline for repair or replacement.
- IP and ownership of the 3D model. Who owns the design files, and whether the manufacturer can reuse or resell the form.
- Timeline with liquidated consequences. Dates for fabrication, shipping and installation, and what happens if they slip.
Have a project in mind?
Selection is the part of a sculpture commission you can still control completely. Get the grade, the engineering, the finish and the milestones in writing, and the fabrication takes care of itself. If you are planning a stainless steel piece and want the engineering, finish and delivery questions answered up front, send us your project brief and request a quote — you will get a specification-led response, not a lump sum.
A large stainless steel sculpture is not a single act of making. It is a sequence of decisions, each one locking in the ones that follow — which is why understanding how stainless steel sculptures are made is really about knowing what gets decided, and when. A two-metre piece can move from first brief to installed landmark in six to eight weeks. A six-metre artwork on an exposed plaza, with a client committee and stamped foundation drawings, routinely takes four to six months. Both are normal.
How stainless steel sculptures are made: the seven phases at a glance
Every commission runs through the same seven phases, in sequence: correcting a form in clay costs a day, correcting it in steel costs a week, and correcting it after the crane has left costs a season. The table below shows what gets decided at each stage.
| Phase | Key decision made there | What you receive |
|---|---|---|
| 1. Sketch and concept | Silhouette, scale and where the piece will be seen from | Concept sketches and a scale-of-view study |
| 2. 3D design and maquette | The exact finished form, dimensioned and measurable | Digital model and a physical scale maquette |
| 3. Engineering | Wind load, base size, anchor layout, foundation | Structural calculations and foundation drawings |
| 4. Material specification and cut | Alloy grade, wall thickness, sheet nesting | Cutting list and mill certificates |
| 5. Fabrication | Seam placement and weld sequence | Assembled, welded form |
| 6. Finishing | Surface direction and final gloss level | Polished, sealed sculpture |
| 7. Freight and installation | Lifting points, base setting, site tolerance | Installed, anchored artwork |
Step 1: Sketch and concept
The first phase is not drawing — it is looking. We start with the client’s brief, but we spend just as long on the photographs they send of the site: the approach road, the lobby, the plaza at 9am and again at 7pm. Those images tell us the viewing distance, the light direction and the neighbouring colours, and they shape the drawing far more than a written specification does.
A sculpture is not designed to be admired at arm’s length. It is designed to be read from thirty metres away by someone walking past, then rewarded at three metres by someone who stops. That double read drives the first sketches:
- Scale studies — the form is sketched into a photograph of the real site, at the real height, with people for reference. A shape that looks bold on a page can disappear against a building.
- Mood boards — finish, colour temperature and material character gathered alongside the client’s existing interiors, so the piece feels commissioned rather than imported.
- Silhouette tests — the outline is checked in black against a sky, because that is what most visitors will actually see.
We typically present three directions rather than one. Choosing between options is faster than perfecting a single idea that turns out to be the wrong one. Once a direction is agreed, we diagram the full sequence — our process from sketch to installation — so the client knows how many approval points are coming.
Step 2: 3D design and the maquette
A sketch is a promise. A maquette is a specification. This phase converts the agreed direction into something measurable, and it is where budget and structural reality enter the conversation.
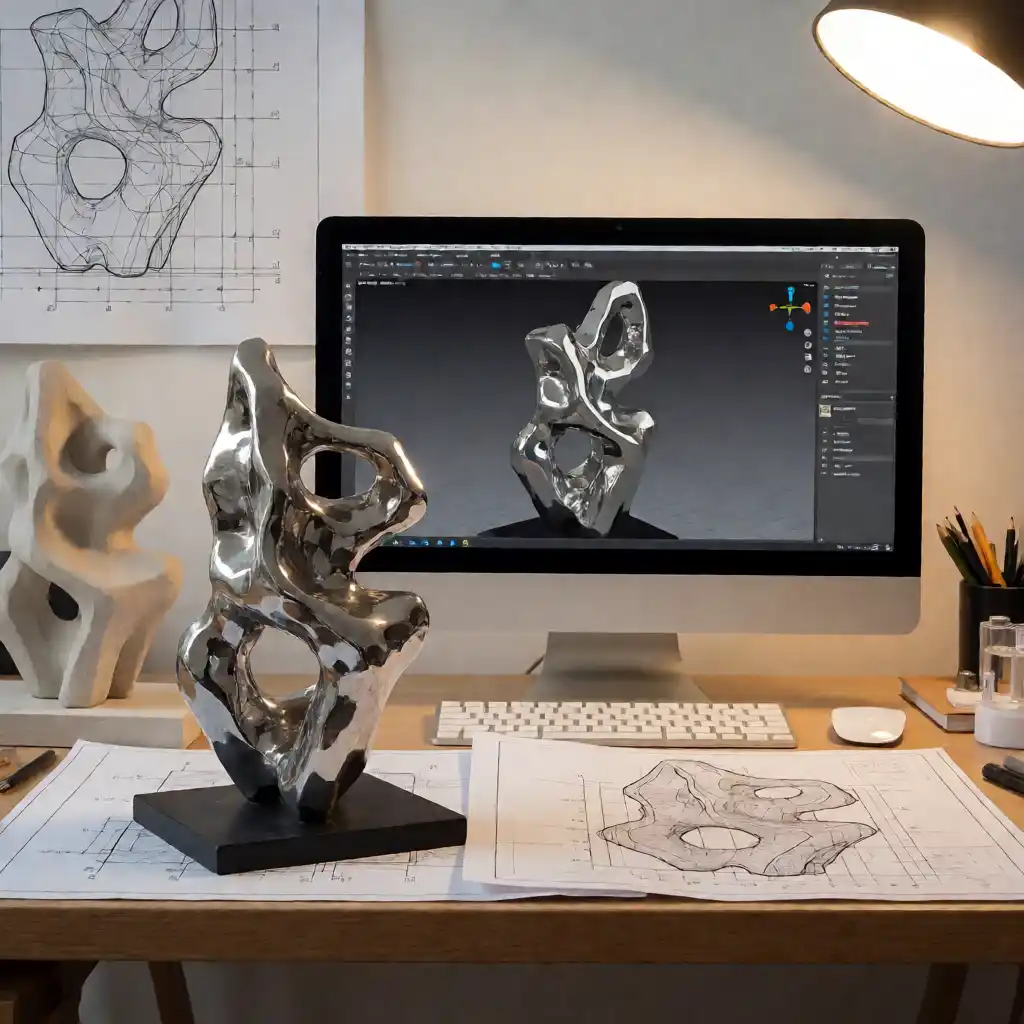
The form is built digitally first, usually in ZBrush for organic sculpture or Rhino when the geometry is architectural, then refined for fabrication. Surface continuity matters more than it does in a render: a highlight that ripples in the digital model will ripple in the mirror finish.
From the digital model we produce a physical maquette, normally at 1:25 for a piece of two to four metres and 1:50 for anything larger. Clients often ask why they cannot simply approve a render. There are three reasons:
- Mass and presence — a screen cannot show how much visual weight a form carries in a room. A maquette can, especially viewed from the intended distance.
- Hand-eye judgement — people judge an object far better than a flat image of one. Flaws invisible on a monitor are obvious in a model on a table.
- A common reference — the maquette becomes the contractual reference for both sides. What is approved in clay is what gets built in steel.
Revisions at maquette stage are expected and inexpensive. We allow two rounds within the quoted fee; a late change is rarely local, and moving a limb usually means re-engineering the base.
Step 3: Engineering and structural design
This is the phase clients underestimate, and the one that protects everything else. A stainless form is light and thin-walled; wind does not care how beautiful it is. For anything over roughly one metre on an exposed site, engineering is not optional — it is the difference between a landmark and a liability.
The engineer takes the approved geometry and works through four things:
- Wind load — calculated from the site’s basic wind speed, exposure category, terrain and the sculpture’s projected sail area, following a local code such as ASCE 7 or EN 1991-1-4. Our guide to wind loading on large stainless sculptures walks through the numbers on a worked six-metre example.
- Base design — whether the piece is bolted to an existing slab, grouted into a cast pad, or ballasted from above where no excavation is possible.
- Anchor bolt layout — bolt diameter, embedment depth and spacing, chosen so the uplift tension is taken either by the concrete mass or by the anchors themselves.
- Foundation drawings — issued for a locally licensed engineer to review and stamp against local soils and codes, which keeps the site’s approval process clean.
We supply design forces, reactions and connection geometry; the site-side engineer signs off. Nothing is cut until those drawings are closed, because the base is the one part of the sculpture that cannot be adjusted later with a grinder.
Step 4: Material specification and cut
Wall thickness is decided here, at the drawing board, not at the bench. It sets the weight, the cost, the weld procedure and how much the finished surface can be worked.
Two grades do almost all the work in outdoor sculpture:
| Grade | Typical use | Note |
|---|---|---|
| 304 | Inland, sheltered sites, interior work | Lower cost, excellent finish |
| 316 / 316L | Coastal, salt-laden or industrial air | Molybdenum content resists chloride pitting |
Sheet is specified by thickness — commonly 1.5 mm to 3 mm for sculpture, thicker where the form is structural or the finish is highly reflective. We then nest the parts across the sheet in software to minimise offcut, cut them on a waterjet or plasma table, and record heat numbers so every panel is traceable back to its mill certificate. For a deeper comparison of the two grades, read 316 vs 304 stainless steel for outdoor sculpture.
The cut is the moment the project stops being an idea. From here on, changes carry material cost.
Step 5: Fabrication
Fabrication turns flat cut panels into a continuous three-dimensional form — the most visible craft in the process and the phase most often judged by its weld lines.
Forming and bending
Panels are shaped on an English wheel, press brake or slip roller, and for compound curves, hand-planished over a former. We work to the digital model using templates cut from the same data, so the formed panel matches the maquette rather than approximating it.
Welding and seam placement
Joints are TIG welded — slower than MIG, but cleaner, with less spatter and a softer heat-affected zone that polishes out more predictably. Seams are not placed where they are convenient; they are placed by design:
- on a natural edge, a shadow line or a change of plane, where the eye already expects a break;
- away from the areas closest to the viewer’s eye level;
- in a sequence that balances heat input, so the form does not distort as it is welded out.
The goal is a weld plan that makes the finished surface read as one continuous form. A visitor should never be able to count the parts — only the shape. Because the weld is also the corrosion-critical joint, this is where alloy and filler choice matter most.
Step 6: Finishing
Finishing is where a well-built sculpture becomes a good one. It is also where a poor weld can no longer be hidden. Every step here removes material, so the order matters and nothing can be rushed.
Grind, shape and progressive abrasives
Welds are dressed back level with the surrounding surface, then the whole form is worked with progressively finer abrasives — typically from 80 grit through 120, 240, 400 and on to 800 and finer. Each stage removes the scratches of the previous one.
Polish and protective sealant
A mirror finish is always the last operation, and it is done slowly, by hand. Machine polishing generates heat that can smear the surface and burn edges on thin sheet, so the final passes are made by hand with felt bobs, checked under raking light rather than straight-on light. For a satin finish the sequence stops earlier and the direction of the grain is controlled deliberately. See the mirror-polished hotel lobby sculpture for how this reads in a lit interior.
The finished piece is then cleaned, passivated where required and sealed. On marine sites a clear protective coat is added and recorded, so it can be renewed on a schedule rather than discovered to be missing.
Step 7: Freight and installation
The last phase is logistics, and it is where a project that ran smoothly in the workshop can still go wrong. Planning starts weeks earlier, not on the day the truck arrives.
- Crating — custom steel-and-plywood cradles that support the sculpture at its designed contact points, never on the finished face.
- Insurance and documentation — transit cover, packing list, finish touch-up kit and the maintenance note.
- Crane day — lift plan, rigging points designed into the internal frame during fabrication, and a site survey confirming access, ground bearing and overhead clearance, plus any road permit or night lift window.
- Setting the base — the sculpture is landed on the anchors, checked for level and plumb, shimmed where the slab is not true, then the anchor nuts are torqued. See a live example in this resort pool fountain installation.
- Final site check — cover plates, sight-line review from the intended viewing points, protective film removal and a photographic handover record.
Install day is the day the sculpture stops being a product and starts being architecture.
How stainless steel sculptures are made to last for decades outdoors
Durability is decided by four quieter details built in along the way.
- Correct alloy for the air — 316 rather than 304 within about a kilometre of salt water, and in industrial or pool-chemical environments where chloride pitting is the real enemy.
- Closed or drainable internal structure — hollow forms need drain holes and ventilation. Trapped moisture inside a sealed stainless shell is the single most common cause of early corrosion in outdoor work.
- Weld quality and passivation — a sound TIG weld, cleaned and passivated, resists corrosion at the joint as well as the panel. Weld heat tint left in place is where rust usually starts.
- A finish that can be maintained — the gloss level should match the site. A mirror finish needs periodic cleaning to stay a mirror; a satin finish forgives more.
A well-specified stainless sculpture outdoors is a 25-to-50-year object on a light maintenance cycle: an annual wash, a periodic inspection of the base and anchors, and a recoating interval recorded at handover.
Timeline and what drives it
The honest answer to “how long does it take” is that approval cycles, not fabrication, are usually the long pole. What stretches a project is a design committee, a site-side engineer’s queue, or a foundation that has to be verified before anchors can be ordered. More guides on material choices, timelines and finishes are collected in the journal.
| Step | Typical duration | Who approves | Common delay cause |
|---|---|---|---|
| 1. Sketch and concept | 1–2 weeks | Client or design lead | Brief still changing; site photos not yet supplied |
| 2. 3D design and maquette | 2–4 weeks | Client, plus any committee | Late revision rounds after the maquette is shipped |
| 3. Engineering and structural design | 1–3 weeks | Site’s licensed structural engineer | Engineer availability; unverified existing slab capacity |
| 4. Material specification and cut | 3–10 days | Studio, with client sign-off on grade | Grade changed late; mill delivery lead time |
| 5. Fabrication | 2–6 weeks | Internal QC, client review if requested | Scope creep after cutting; re-forming a distorted panel |
| 6. Finishing | 1–3 weeks | Client on finish sample and final gloss | Gloss level revisited after polishing has started |
| 7. Freight and installation | 1–2 weeks | Site manager and crane contractor | Crane access, permits, weather window, base not ready |
Add the durations together and a straightforward inland piece lands around six to eight weeks of studio time, with another two to six weeks of client and engineer turnaround. Coastal, oversized or publicly funded work sits at the far end of every range. Our commissioning enquiry process gives you a dated schedule against your site.
Have a project in mind?
If you have a site, a height and a rough idea of the effect you want, that is enough to start. Send us the location, a few photographs of where the piece will stand and the height you are working towards, and we will come back with a concept direction, an indicative budget band and a dated schedule. We can also tell you early whether the site will need stamped engineering and a cast foundation — the single question that moves a timeline most. Request a quote for your stainless steel sculpture and we will take it from there.
Outdoor stainless steel sculpture maintenance is one of those subjects where the marketing and the metallurgy disagree. The sales line is that stainless is “maintenance free”, and the practical reality is that it is low maintenance — not zero. The metal itself is genuinely tough, but the finish you paid for is a thin, reflective skin on top of it, and that skin is what collects the water spots, the fingerprints and the fine scratches you notice from three metres away. The good news is that care for a stainless steel sculpture takes minutes rather than hours, provided you understand which finish you own and what it actually reacts to.
The honest truth: the metal is easy, the finish is not
Grades 304 and 316 will not structurally rust under normal outdoor service. That is not optimism, it is chemistry: both alloys form a chromium-oxide passive layer roughly a few nanometres thick that re-forms instantly when oxygen is present. A sculpture can stand outside for thirty years and still carry its rated load. When a client calls to say their piece “is rusting”, what has almost always happened is that the surface finish has degraded — and a degraded finish looks like failure even though the structure is perfectly sound.
Dullness, water spotting and the occasional shallow pit are finish problems, not metal problems. They appear because the passive layer is only a few nanometres thick and it is continuously being asked to repair itself in the presence of chlorides, standing water and whatever the air carries. Where the layer cannot keep up — under a dried mineral deposit, or inside a scratch that holds moisture — the surface loses its mirror or its satin uniformity, and the reflection breaks up.
This is the opposite of what happens with bronze. A cast bronze sculpture is expected to develop a living patina; the green-brown film is the point, and conservators actively manage it. Stainless has no such tradition. A stainless patina is not a desirable finish — it is a defect, and the whole maintenance regime exists to prevent it. If you are still choosing between the two materials, our comparison of stainless steel versus bronze for sculpture explains where each one earns its place. For everyone who has already installed stainless, the rule is simple: you are not protecting the metal, you are protecting the surface. That is a much smaller, much more achievable job.
What actually damages an outdoor stainless finish
Nearly all visible deterioration on an outdoor stainless sculpture traces back to one of five causes. Learning to recognise them is more useful than any cleaning product, because each has a different remedy.
Hard-water spotting
Rain and tap water both carry dissolved calcium and magnesium. When a droplet dries on a warm, polished surface it leaves the mineral behind as a pale ring. Repeat that a few hundred times over a summer and the rings overlap into a milky haze that no amount of gentle wiping removes. This is the single most common complaint we hear, and it is entirely preventable by drying after wetting.
Fingerprint and grease film
Skin oils and airborne cooking or traffic grease form an invisible film that scatters light. On a mirror finish it reads as a dull patch; on a satin finish it can look like a streak that follows the light. It is harmless to the metal, but it destroys the crisp reflection that justified the polish in the first place.
Airborne chloride
Coastal salt spray, de-icing salt carried on the wind, and pool chlorine all deliver chloride ions to the surface. Chlorides are the one contaminant that can genuinely attack the passive layer, and they are the reason 316 rather than 304 is specified for marine and pool-side work.
Mechanical scratches from cleaning tools
Ironically, most scratches are inflicted by well-meaning maintenance. Abrasive pads, scouring sponges, steel wool and dry paper towels all cut micro-grooves into the finish. Steel wool is worse still: it deposits free iron particles that then rust on the surface, producing brown speckles that look like the sculpture itself is corroding.
Acid rain and industrial fallout
In urban and industrial locations, sulphur and nitrogen compounds in rainfall, plus carbon-rich particulate from traffic and combustion, build a grey film and slowly etch the surface. The effect is cumulative and shows up as a loss of contrast rather than an obvious stain.
Maintenance by finish type
There is no single cleaning interval for stainless steel sculpture maintenance, because the finish dictates the effort. A bead-blasted piece and a mirror-polished piece can sit ten metres apart on the same site and need completely different attention. Identify your finish first, then follow the matching regime. If you are unsure which surface your piece carries, the finish specifications are listed on our sculpture materials reference page.
Mirror-polished — needs regular attention
Mirror polish is the most demanding finish because every imperfection, every water ring and every fingerprint shows against a high-contrast reflection. Inland, plan on a light clean every four to six weeks. At a coastal or pool-side site, every three to four weeks is realistic. The upside is that cleaning is fast: a rinse, a neutral detergent wipe and a dry-down takes under ten minutes on a typical two-metre piece.
Satin and brushed — forgiving, low effort
A satin or brushed finish scatters light rather than reflecting it, which hides water spots and fine handling marks well. Every eight to twelve weeks inland, and every four to six weeks near salt water, is usually enough.
Hairline
Hairline finishes are directional and therefore slightly less forgiving than satin, because an incorrectly directed wipe leaves visible cross-grain streaks. Clean every six to ten weeks, and always work along the grain. Once the habit is set, hairline is nearly as low-effort as satin.
Bead-blasted — the lowest-maintenance option
A bead-blasted surface is matte and micro-textured. It hides everything short of a genuine stain, and a rinse-down twice a year is often the entire programme. The trade-off is that the texture holds contamination a little more tenaciously, so when it does need cleaning, a soft brush is more effective than a cloth alone.
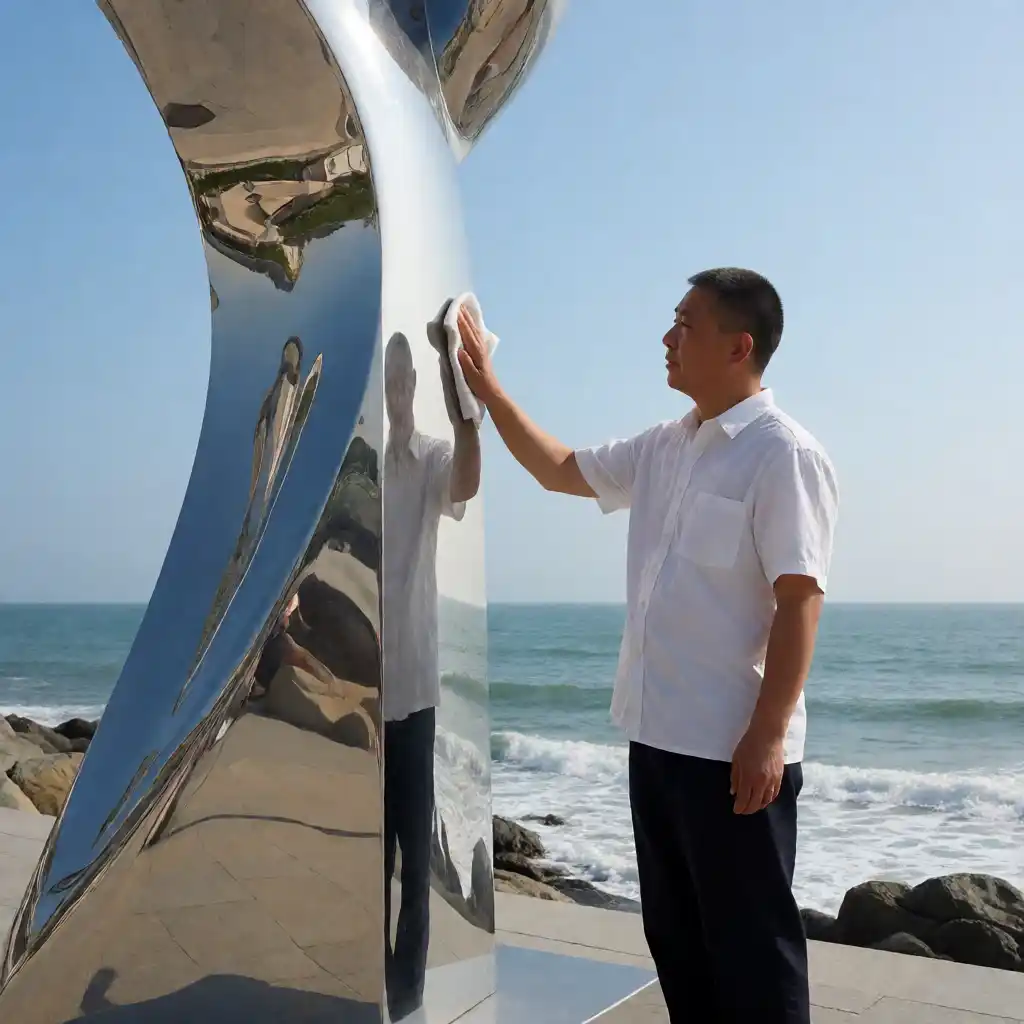
A stainless steel sculpture maintenance frequency schedule
The table below turns the guidance above into practical intervals. Treat it as a starting point and shorten the interval during the first year after installation, when you are still learning how a specific site treats a specific piece.
| Finish | Clean every | Water used | Cloth | Special note |
|---|---|---|---|---|
| Mirror-polished | 3–4 weeks coastal; 4–6 weeks inland | Soft or filtered water | Clean microfibre, one per pass | Dry immediately; never let it air-dry |
| Satin brushed | 4–6 weeks coastal; 8–12 weeks inland | Warm tap water is fine | Soft microfibre | Always wipe along the grain direction |
| Hairline | 6–10 weeks | Warm tap water | Soft microfibre, single direction | Cross-grain wiping is the main risk |
| Bead-blasted | Twice a year | Warm tap water | Soft brush plus microfibre | Brush gently; rinse thoroughly afterwards |
A simpler rule sits alongside the table: any time the sculpture has been rained on, misted with salt spray or splashed with chlorinated water, give it a fresh-water rinse and a dry-down within a day or two.
The correct stainless steel sculpture maintenance and cleaning routine
The routine is short, and the order matters more than the products. Work top to bottom so that dirty water never runs onto a section you have already cleaned.
- Rinse first, with soft water. Flood the surface to lift loose dust and grit. Rinsing before wiping is what prevents scratches — grit trapped under a cloth is the usual cause of “mystery” scratches.
- Wash with warm water and a neutral pH detergent. A few drops of mild dish soap in a bucket of warm water is ideal. Neutral pH means the detergent will not attack the passive layer.
- Wipe along the grain. On brushed and hairline finishes, move the cloth in the direction of the visible lines. On mirror finishes, work in straight overlapping passes rather than circles.
- Rinse thoroughly. Detergent residue left on the surface attracts dust and dries to a film. Rinse until the water sheets evenly with no soap streaks.
- Dry with a clean microfibre cloth. This is the step people skip, and it is the step that matters most. Drying is what prevents hard-water spotting.
- Retire cloths that have touched the ground or grit. A contaminated cloth will scratch every surface it touches afterwards.
For visible salt or mineral residue, a 1% white vinegar solution works as a one-off rinse — follow it immediately with fresh water and a dry-down. Vinegar is acidic: treat it as a remedy, not a routine cleaner.
What to never use on stainless
Almost every stainless “horror story” we are asked to repair starts with a cleaning product that should never have been near the surface. The list is short, and it is worth memorising.
- Abrasive pads and steel wool. They scratch the finish and embed free iron particles, which then rust and leave brown specks that look like corrosion of the sculpture itself.
- Chlorine bleach. Sodium hypochlorite is aggressive towards the passive layer and is a direct cause of pitting. Never leave a bleach solution on stainless, even briefly.
- Harsh acids and strong alkalis. Mortar and grout removers, limescale descalers and oven-type cleaners will etch the surface within minutes.
- Wire brushes and metal scrapers. These cause deep mechanical damage and can transfer iron contamination in a single pass.
- Wax-based “metal polishes”. The wax fills the surface and gives a short-lived shine, then yellows and traps dirt. It creates far more work later than it saves now.
- Pressure washing at close range. High-pressure jetting can erode a bead-blasted texture and drive water into seams and fixings. If you must pressure wash, keep the nozzle well back and use a wide fan.
Coastal and pool-side sites need more
Chloride is the variable that changes everything. Inland, a stainless sculpture may go its whole life without ever seeing a chloride concentration high enough to matter. Within a few hundred metres of the sea, or beside a chlorinated pool, the surface is dosed regularly with chloride ions that interfere with the passive layer’s ability to repair itself. Add repeated wetting and drying — the classic pattern on a promenade or a pool deck — and you have the conditions under which pitting actually starts.
That is why specifiers move up to grade 316 for coastal work: the molybdenum in 316 makes the passive layer markedly more resistant to chloride attack. The background is covered in detail in our guide to 316 versus 304 stainless steel for sculpture. A marine installation such as our coastal 316 stainless sculpture is built around that grade, and the specification only works if the maintenance regime keeps pace with the environment.
If your piece sits in permanent wet contact, the stakes rise again. A hotel water-wall installation is never dry, so deposits never get the chance to wash away; those fixtures need scheduled descaling with a neutral product rather than occasional cleaning.
For every chloride-exposed site, the single highest-value maintenance action is also the cheapest: rinse the sculpture with fresh water after salt spray or chlorinated splash, and dry it. A thirty-second rinse after a storm removes the chloride that would otherwise sit on the surface for days. Nothing else you can do delivers the same return.
When dullness becomes a problem
Not all dullness is equal. The three categories below need very different responses, and the way to tell them apart is to clean the area properly first — a surprising number of “problems” are simply films that never got removed correctly.
Surface staining that rinses out
If a mark disappears with warm water, neutral detergent and a microfibre dry-down, it was a deposit: mineral spotting, grease film, dust or salt residue. This is normal wear on the maintenance cycle. No repair, no cost, no specialist involvement.
Etching that needs a repolish
If the mark survives cleaning and you can see it in a raking light as a change in surface texture rather than something sitting on top of the surface, the finish has been etched or micro-scratched. This is a cosmetic problem, not a structural one. The remedy is a localised repolish by a fabricator, which restores the original finish in the affected area. Because repolishing is a skilled operation, it carries a real cost — typically a modest fraction of the original fabrication price, and it is worth pricing alongside the alternatives. Our stainless steel sculpture cost guide breaks the numbers down so you can compare repolishing against replacement.
Pitting that requires local repair or replacement
Pitting is different. Look for small dark dots or clusters that have depth, often with a rust-coloured bloom, and focus on places where water sits: horizontal ledges, the base plinth, low recesses and fixing points. Pitting is the one condition that does reach the metal. Light, localised pitting can be ground out and re-polished by a fabricator; extensive pitting across a large panel may make replacement of that section the more economical choice. Any pitting on a piece installed in the last two years is worth reporting to the original supplier, because it usually points to a grade or fabrication issue rather than maintenance.
| Symptom | What it means | Action |
|---|---|---|
| Mark vanishes when cleaned | Deposit: mineral, grease or salt film | Keep the routine; shorten the interval |
| Visible in raking light, flat, no depth | Etching or micro-scratch in the finish | Localised repolish by a fabricator |
| Dark dots with depth and a rust bloom | Pitting into the metal | Grind out and repolish; replace panel if extensive |
Have a project in mind?
Stainless steel sculpture maintenance is far less daunting once you match the routine to the finish and the site. If you are specifying a new piece — or replacing one where the finish has been lost — we can advise on the right grade and the right surface for your environment before fabrication begins. Tell us the location, the exposure and the look you want, and we will recommend a finish that stays brilliant with the care you are realistically able to give it. Request a quote for your stainless steel sculpture project and we will come back with a specification, a finish recommendation and a maintenance schedule written for your site.
Almost every enquiry that lands in our workshop inbox opens the same way: “before we go any further, what does a stainless steel sculpture cost?” It is a fair question, and an unusually hard one. A 600 mm garden piece and a 9 m airport landmark are both “stainless steel sculptures,” yet they sit two orders of magnitude apart in price. Material is only about a quarter of the answer. The rest is geometry, finish, engineering, freight and the crane that lifts it over the fence. This guide gives you the 2026 ballpark ranges we quote from, the four variables that swing them most, and the six pieces of information that turn a range into a firm number.
How much does a stainless steel sculpture cost in 2026?
Stainless steel sculpture cost in 2026 breaks down into four broad bands. These are ballpark ranges from our own workshop, based on completed projects through 2025 and current mill pricing — they are reference points, not quotations. Every project is priced on its own drawings, and a firm number only exists once the brief is fixed.
- Small decorative (under 1 m): USD 2,500–8,000. Tabletop and garden-scale pieces, single form, simple plate construction. At this size the sculpture is essentially a fabrication job with a nice finish.
- Mid-size feature (1–3 m): USD 8,000–35,000. The most common brief — a plaza centrepiece, a hotel forecourt, a memorial. Requires an internal armature, a designed base and lifting points. A good reference is our mirror-polished plaza fountain, which sits in this band.
- Large architectural (3–6 m): USD 35,000–120,000. Engineered structures with wind analysis, bolted site joints and a foundation interface. Freight becomes a real line item. See our airport landmark installation for what this band produces.
- Monumental landmark (over 6 m): USD 120,000+. Bespoke engineering, staged fabrication, multiple site deliveries, certified welding and inspection. Some are seven figures.
Two rules of thumb help. First, cost scales faster than height: doubling a form’s height roughly cubes the steel volume if you scale it proportionally, and polishing labour scales with surface area, not length. Second, the spread inside each band is wide. A 2 m brushed piece in 304 with a simple ground pad can come in at USD 9,000; the same footprint in mirror-polished 316 on a rooftop, with wind certification and a crane lift, can reach USD 30,000. That gap is the entire subject of the next section.

The four factors that move the number
When a quote surprises a client, it is almost always one of four things. Understand these and you can predict roughly where your project will land before you ever ask for a price.
1. Size and volume of steel
Price follows the volume of steel and the hours of labour, not the silhouette. A tall, thin form may use less material than a compact, bulky one. Hollow fabrications save weight and cost, but only where the geometry allows — a tight compound curve may demand more forming hours than a simple box of twice the volume.
2. Finish
Finish is the single most under-estimated cost driver. A brushed (satin) finish is produced with a linear abrasive pass and is relatively quick. A true mirror polish requires progressive grit stages up to fine compound, often hand-worked into curves and welds, and can add 30–60% to fabrication labour. The larger the surface area and the more complex the curvature, the wider that premium becomes.
3. Structural engineering
Anything outdoors is a structure, not a statue. Wind load governs the plate thickness, the size of the internal spine, the number and pattern of anchor bolts, and the design of the base. A coastal or exposed site can push loads up sharply. For a detailed treatment, see our guide to wind loading on large stainless steel sculptures. Engineering and its certification typically account for 8–15% of a large project’s budget and are not optional.
4. Logistics and installation
Freight, cranes, permits and site access are frequently 10–20% of the total. A sculpture that fits a standard container is cheap to move; one that needs a low-loader, an escort and a night-time road closure is not. If the crane has to be parked three streets away and the piece carried in, that shows up in the price. Always tell the fabricator how close a truck can get.
304 vs 316 stainless steel: which grade, and the cost difference
The two grades that dominate architectural sculpture are 304 and 316. Both are austenitic, non-magnetic in the annealed state, and weld well. The difference is molybdenum: 316 contains 2–3% molybdenum, which dramatically improves resistance to chlorides — salt spray, coastal air, de-icing road spray and swimming-pool atmospheres. As a rule, 316 runs roughly 20–40% above 304 on the mill price of the sheet, which translates to a smaller but still meaningful premium on the finished sculpture, since steel is only part of the cost.
Which should you specify?
- Choose 304 for inland sites, sheltered courtyards, indoor installations and anywhere more than roughly 10 km from salt water.
- Choose 316 for coastal and marine sites, rooftop and elevated installations, fountains and water features, roadsides with winter salting, and any piece in an industrial or high-pollution atmosphere.
- Choose 316L (low-carbon) where heavy welding is required in thick sections, to reduce the risk of weld sensitisation.
The trap is specifying 304 to save budget on a coastal project. The saving is real and immediate; the cost is tea-staining and pitting that appears within two to five years and cannot be polished out without removing material. We have written a full comparison of chemistry, corrosion behaviour and life-cycle cost — see 316 vs 304 stainless steel for sculpture. Our default recommendation for any outdoor piece within sight of the sea is 316, without exception.
The real cost of “cheap” sculpture
It is entirely possible to buy a stainless steel sculpture for half our price. It is also possible to buy one that has to be replaced in four years. The difference rarely shows up on the drawing — it hides in metal thickness, weld preparation, passivation and base design. These are the failure modes we are most often called in to repair.
- Hairline pitting and tea-staining. Usually the wrong grade for the environment, or a finish that was never properly passivated after fabrication. Free iron contamination left on the surface becomes rust spots within a season.
- A loose base. Under-engineered anchorage or a base plate too thin to distribute wind load. The sculpture begins to rock, then the welds crack, then the piece becomes a safety issue and must be taken down.
- A finish that dulls in year two. Cheap polishing leaves directional scratches that trap dirt. The mirror look fades to a hazy grey and cannot be restored by cleaning alone.
- Weld discolouration bleeding through. Heat tint not removed before finishing re-appears as dark ghost lines once the piece is outdoors.
The arithmetic of re-doing a sculpture is brutal: removal, disposal of the old piece, a second full fabrication, and a second installation — plus the reputational cost of a landmark that rusted. Total cost of ownership, not sticker price, is the right comparison. It is also worth remembering that stainless steel is not always the cheapest metal up front; cast bronze is often less expensive for smaller, highly detailed work, though it has its own life-cycle profile. We compare the two in stainless steel vs bronze for outdoor sculpture.
A stainless steel sculpture cost comparison table
The table below consolidates the four bands into something you can hold against a real brief. Treat the ranges as indicative; the “Notes” column is where the real variability sits.
| Category | Typical height | Steel volume | Indicative range (USD) | Typical grade | Notes |
|---|---|---|---|---|---|
| Small decorative | 0.3–1.0 m | 15–60 kg | 2,500–8,000 | 304 | Tabletop to garden; simple plate forms; indoor or sheltered |
| Mid-size feature | 1.0–3.0 m | 80–350 kg | 8,000–35,000 | 304 or 316 | Plaza, forecourt, memorial; armature and designed base required |
| Large architectural | 3.0–6.0 m | 400–1,500 kg | 35,000–120,000 | 316 / 316L | Wind certification, bolted site joints, freight is a major line |
| Monumental landmark | 6 m+ | 1,500 kg+ | 120,000+ | 316 / 316L | Bespoke engineering, staged fabrication, certified inspection |
Read the volume column as carefully as the price column. A mid-size piece at the top of its weight range is approaching a large piece in cost, even if the height suggests otherwise. Bulky, closed, heavy-wall geometry is expensive regardless of how tall it stands.
A second comparison: mirror-polished vs brushed finish
Finish choice affects price, maintenance and how the sculpture reads from a distance. Mirror polish is dramatic and photogenic; brushed satin is quieter and far more forgiving. Neither is “better” — the right answer depends on the site and the maintenance regime the owner will actually follow.
| Attribute | Mirror-polished | Brushed (satin) |
|---|---|---|
| Cost premium vs mill finish | High — 30–60% added fabrication labour | Moderate — single directional pass |
| Durability in exposed sites | Good in 316; haze and micro-scratches show | Excellent — scratches blend into the grain |
| Visibility of fingerprints | High at hand height; less so above 2 m | Low |
| Best sites | Sheltered plazas, lobbies, water features, focal points viewed close up | Coastal fronts, high-traffic areas, rooftops, industrial surroundings |
| Cleaning regime | Regular, with correct cloth to avoid swirl marks | Occasional; tolerant of neglect |
Two practical points. First, on anything above about 4 m the visual difference between a good brushed finish and a mirror finish shrinks, because the viewer is far away and the reflection is dominated by sky. Second, and more importantly, a mirror finish on an exposed coastal site is a maintenance contract, not a one-off purchase. Where wind exposure is significant, engineering decisions and finish decisions interact — see the wind loading guide for how the two are resolved together.
What actually drives stainless steel sculpture cost, by phase
Clients are often surprised at how little of the budget is metal. The table below shows a typical split for a large architectural commission. Percentages move with complexity, but the shape of the distribution is stable — and it is why cutting the design or engineering phase is the fastest way to lose money later.
| Phase | % of total budget | What it includes |
|---|---|---|
| Design & 3D modelling | 8–12% | Concept development, scale drawings, 3D model, renderings for approval, form-finding |
| Engineering | 8–15% | Structural analysis, wind load calculation, connection design, base and foundation interface, certification |
| Fabrication | 30–40% | Steel, cutting, forming, rolling, jigging, welding, dimensional checking — the largest single block |
| Finish | 15–25% | Grinding, weld dressing, polishing or brushing, passivation, final inspection |
| Freight | 5–12% | Crating, container or flat-rack loading, sea or road freight, port handling, insurance |
| Installation | 10–18% | Crane and rigging, site labour, anchor set-out, alignment, welding on site, touch-up, commissioning |
Notice that design and engineering together are roughly a fifth of the budget, yet they determine whether the remaining four-fifths are spent efficiently. A late change to the form — after fabrication has begun — is the most expensive event in the whole programme.
How to get an accurate quote
A quote is only as firm as the brief behind it. Fabricators pad ranges precisely because they lack these six inputs. Send them all in your first enquiry and you will usually receive a fixed figure instead of a bracket.
- Fixed dimensions. Overall height and width in millimetres, plus an indication of whether these are hard limits (a door, a planning constraint) or approximate.
- Finished grade. 304 or 316 — and if you do not know, tell the fabricator the site location and let them recommend. Coastal means 316.
- Finish type. Brushed, mirror, or an intended visual effect (for example a specific satin level or a coloured PVD coating).
- Site conditions. Coastal, inland, rooftop, plaza, water feature, exposed ridge. Include wind exposure and any salt or industrial atmosphere.
- Installation access. How close can a truck get? Is there a crane on site, or must one be hired? Ground conditions, headroom, and any night-work or permit requirements.
- Timeline. Required delivery and installation window. Compressed programmes attract overtime and expedited freight, which is a legitimate cost line.
Photographs of the site and a marked-up plan resolve most remaining ambiguity. If you have a reference image of the look you want, send it — it shortens the design phase and reduces the risk of a mismatch at approval.
Have a project in mind?
Stainless steel sculpture cost is a range until it is a brief, and this guide is designed to help you get from one to the other quickly. If you can send dimensions, grade, finish, site conditions, access and timeline, we will come back with a fixed figure and a realistic schedule — and, where it helps, a comparison of options at different price points. Request a quote for your stainless steel sculpture and tell us what you are trying to build. We will tell you honestly what it takes to build it well, and what it costs to build it cheaply.
The question almost every client asks when commissioning a large stainless steel sculpture is wind load: will a six-metre piece really stay standing in a storm? The reassuring answer is yes — routinely, and to a defined standard. Wind loading on outdoor sculpture is a solved engineering problem, calculated to codes such as ASCE 7 in the United States and EN 1991-1-4 in Europe, and the numbers are usually smaller than clients expect. What matters is that the calculation happens before fabrication, and that the base is designed alongside the artwork instead of being improvised on site.
Why scale changes the engineering of a large stainless steel sculpture
A sculpture under about two metres is essentially self-supporting. Its own mass does the structural work, wind is a nuisance rather than a design driver, and a simple bolted plate is usually enough. Past roughly four to five metres, that stops being true. Wind load on a large stainless steel sculpture grows far faster than height, for three compounding reasons:
- Sail area — the silhouette presented to the wind grows with the square of the height. Double the height and you roughly quadruple the exposed area.
- Wind pressure itself — wind speed increases with height above ground, so the pressure acting on the upper part of a tall piece is higher than at ground level.
- Moment arm — the force acts higher up, so the bending moment at the base is the force multiplied by a taller lever arm.
Multiply those together and the overturning moment at the base scales roughly with the cube of height. A six-metre version of a two-metre form can carry twenty times the bending load at its foundation. That does not make it unsafe — it makes it a structure. Real load paths, real connections, and a real foundation, all of which are ordinary engineering when they are designed in from the start.
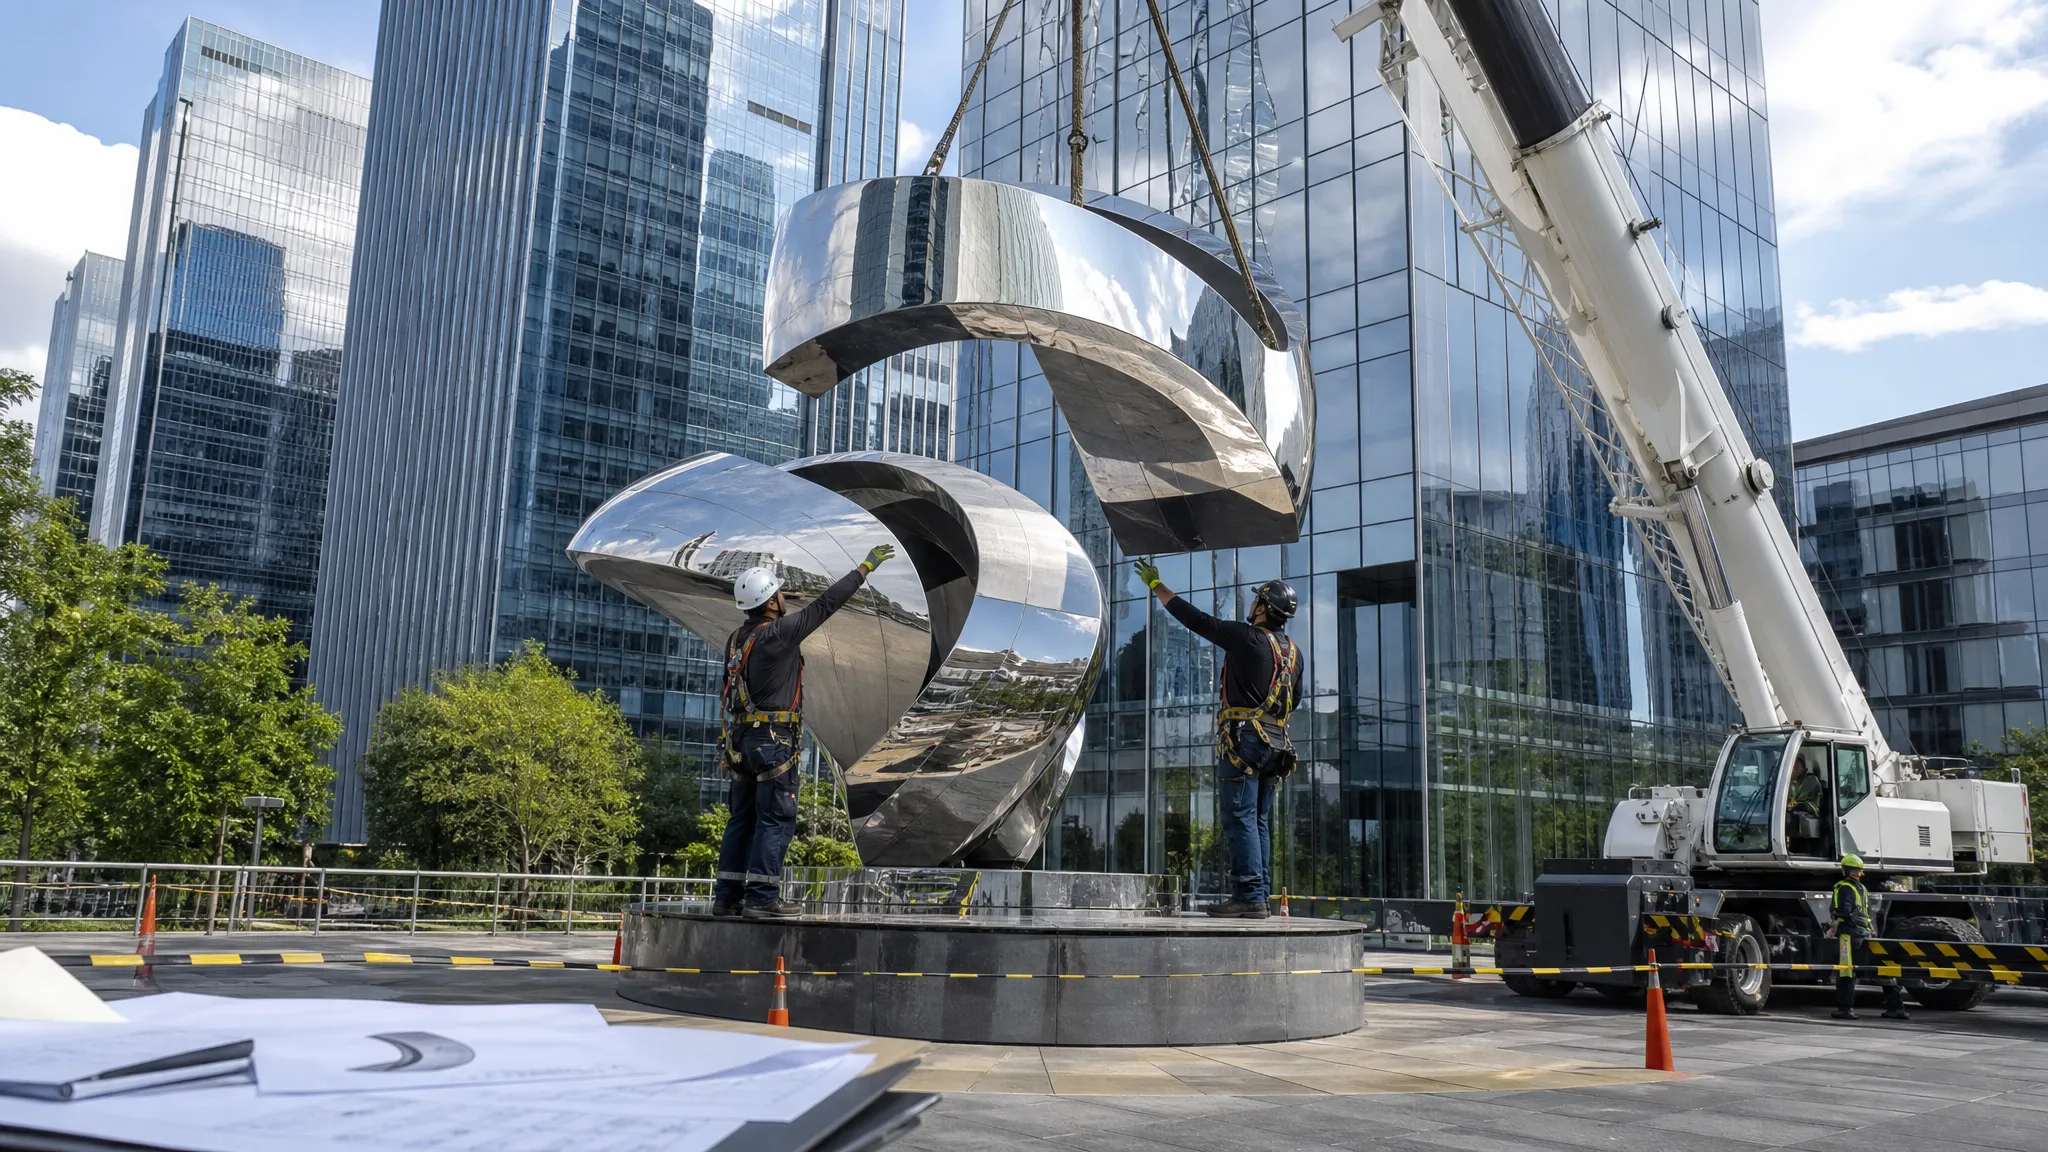
What wind load actually is on a large stainless steel sculpture
Structural engineers reduce wind to four inputs. Once you have them, the force on any sculpture — however abstract — can be estimated with reasonable accuracy.
Dynamic pressure. Wind pressure rises with the square of wind speed. In metric terms q = 0.613 V², where V is wind speed in metres per second and q is in newtons per square metre. ASCE 7 expresses the same relationship as qz = 0.00256 Kz Kzt Kd V² with V in mph and qz in pounds per square foot. V is not a guess: it comes from the code’s basic wind speed map for the site, then adjusted for height (Kz), local topography such as a hilltop or escarpment (Kzt), and wind directionality (Kd).
Exposure category. A sculpture in a dense city centre is sheltered by buildings and trees; one on an exposed seafront or an open plain is not. ASCE 7 describes this with Exposure B (urban/suburban), C (open terrain) and D (flat, unobstructed water or mudflats); Eurocode uses terrain categories 0 to IV. Two identical pieces in two cities will legitimately receive different foundations because of this one input.
Sail area. This is the projected frontal area — the sculpture’s silhouette, perpendicular to the wind. A thin, wide ribbon can present a far larger sail than a compact form of the same height and weight.
Shape factor. The drag coefficient Cf (or cd) accounts for how the wind separates around the form: roughly 0.5 for a smooth sphere, about 1.2 for a cylinder, up to 2.0 for a flat plate, and typically 1.2–1.5 for the curved, semi-open shapes of abstract stainless work. A conservative analysis uses the higher end. A gust effect factor of about 0.85 applies to the rigid, low-frequency structures that most sculptures are.
Real numbers: a worked example to ASCE 7 and EN 1991-1-4
Take a six-metre-tall abstract stainless sculpture, 1.5 m wide, on a commercial plaza in a US city with a basic wind speed of 90 mph (about 40 m/s), Exposure B. The silhouette presents a sail area of about 9 m².
| Step | Input | Value |
|---|---|---|
| Velocity pressure (ASCE 7) | Kz 0.9, Kzt 1.0, Kd 0.85, V 90 mph | ≈ 0.76 kN/m² |
| Cross-check (EN 1991-1-4) | vb 26 m/s, terrain cat. III, z = 6 m | ≈ 0.63 kN/m² |
| Drag coefficient | Cf = 1.3, gust factor 0.85 | — |
| Design force | F = q × G × Cf × A | ≈ 7.5 kN |
| Overturning moment | Force × 3.5 m centre of pressure | ≈ 26 kN·m |
| Stabilising moment | 1.5 safety factor | ≈ 39 kN·m |
So a six-metre stainless landmark is designed for roughly 7.5 kilonewtons of horizontal push — about three-quarters of a tonne, the weight of a compact car leaning steadily against the base. Both codes land within a few percent of each other once their different averaging periods are reconciled, which is exactly what you want to see: the answer is not sensitive to which standard the engineer picks.
Weight and stability: overturning moment versus base mass
Stainless fabrication is thin-walled, so a six-metre hollow piece often weighs only 300 to 600 kg. That creates the central paradox of sculpture engineering: the lighter and more graceful the artwork looks, the harder the base has to work. The sculpture resists wind not by being heavy but by being firmly tied to something that is.
The governing check is overturning. The wind tries to rotate the piece about the downwind edge of its base. That must be resisted either by the mass of the foundation, or by tension in the upwind anchor bolts, or — usually — a combination of both. From the worked example, the required restoring moment is about 39 kN·m, and a reinforced concrete pad of roughly 1.6 m × 1.6 m × 1.0 m — around six tonnes — supplies about 48 kN·m, comfortably above it. On an existing slab where no such pad can be cast, the anchor bolts are instead designed to take the uplift tension, which is why the slab’s thickness and reinforcement have to be verified before the anchors are specified.
Public artwork above a certain height frequently requires a stamped structural design from a locally licensed engineer. We supply the design force, the reactions and the connection geometry; the foundation is typically detailed by an engineer local to your site, who signs off on local soils and codes. That division of responsibility is normal and keeps your approval process clean.
Base and anchorage options: bolted, grouted, ballast
The base is where the artwork stops being art and becomes infrastructure. There are three standard approaches, and the choice is usually driven by the finish and the site rather than by structural capacity.
Bolted base plate. A laser-cut stainless plate welded to the internal armature, fixed down with M20–M30 anchor bolts into cast-in-place concrete or chemical anchors into an existing slab. It is the most explicit option: inspectable, adjustable during installation, and removable — the sculpture can be unbolted and craned away for cleaning or relocation. The trade-off is a visible bolt ring, which many clients hide under a decorative stainless skirt.
Grouted socket. The sculpture’s base sleeve is set into a formed pocket in the foundation and filled with non-shrink structural grout. The result is extremely rigid with no visible fixings, which is why it is the default for mirror-polished work on plazas and in water features. It is effectively permanent — dismantling means breaking out the socket.
Ballast base. Where the surface cannot be penetrated — roof terraces, podium decks, leased retail forecourts, indoor atria — the piece is carried on a weighted steel or concrete plinth sized so its own mass provides the restoring moment. The structure below must still be checked for the added dead load.
In every case the sculpture needs an internal armature: a stainless tube or plate spine sized for the bending moment, with the skin welded to it.
Why fabrication tolerance matters: seams and wall thickness
Wind engineering sets the loads; fabrication quality decides whether the piece actually achieves them. Three details matter more than any other.
Wall thickness. Three millimetres is common for sculptural skins, but four to six millimetres is typical where panels are large or the piece stands free above four or five metres, so the skin cannot buckle between internal ribs. Thicker is not automatically better: unnecessary weight loads the foundation, and heavier sections weld with more distortion. The right thickness is a design decision, not a default.
Seam quality. Critical seams are butt-welded and back-purged for full penetration, then ground and polished flush. A cold lap, undercut or incomplete fusion is not merely cosmetic — it is a stress riser and a corrosion site. On 316 stainless in coastal air, a crevice is where tea-staining begins, and on a cyclically loaded sculpture it is also where a fatigue crack would start. Critical welds are inspected, and the alloy itself is sometimes verified by positive material identification to confirm that 316 is genuinely 316.
Dimensional tolerance. Mirror-polished panels reveal every misalignment. Acceptable step between adjacent panels is measured in fractions of a millimetre, and each weld shrinks as it cools, so weld sequence and tacking plans control distortion rather than repair it afterwards. Tolerances must be agreed before cutting.
What this means for your commission
None of this is exotic, and none of it should be a surprise revealed after deposit. A properly run project freezes the wind load calculation and the base concept before any stainless is cut, then delivers a piece whose reactions your local engineer can design to.
See how we run that sequence end to end on our fabrication process page, browse completed works for scale and context, or look at the abstract stainless landmark we fabricated for a commercial plaza — a piece of exactly this height and type. If you have a site and a sketch, send us both, and we will come back with the design force, the base concept and a realistic programme.
Stainless Steel Water Feature vs Fountain: The Core Difference
The question architects and hotel developers ask us most often is not which finish to specify, but which object to build: the stainless steel water feature vs fountain decision. Both move water through a closed recirculating loop with a pump, both can be fabricated in 304 or 316 stainless, and both look spectacular in a render. The difference only becomes visible once you know where the water actually goes, how much wind the site gets, and who has to clean it in year five. This article walks through the four things that genuinely decide it — appearance, hydraulics, maintenance and running cost — and finishes with a decision table you can take straight into a design meeting.
A water feature treats water as a surface. The water is a thin film or sheet that runs over a sculptural form and disappears into a concealed trough, or it is a still reflecting plane that mirrors the sculpture and the sky. The water never leaves the container, so the piece reads as architecture first and moving water second. A fountain treats water as a projectile. Jets throw water into the air, it breaks into droplets, aerates, catches the light and falls back into an open basin. The movement is the display. Everything else — pump duty, basin depth, cleaning routine, wind exposure — flows from that single structural difference.
Look and Feel: the Reflective Object or the Playful Jet
A sculptural water feature is a quiet, high-value gesture. Mirror-polished stainless with a moving water film animates the reflections around it: the sky changes through the day, the building façade slides across the curve, interior lights come up at dusk and start to glow through the film. In a hotel arrival court or a lobby forecourt this reads as luxury and calm, and it photographs well from almost any angle. Critically, the sculpture still reads as a piece of design when the pump is switched off — a point that matters more than most clients expect.
A fountain is an active, social gesture: movement, splash, sound and energy. Broadband jet noise is genuinely useful in a noisy urban plaza because it masks traffic, and the open basin is inherently playful — exactly what retail, leisure and family settings want. The trade-off is that a fountain depends on its pump for its identity: when the pump is down, what remains is an empty basin, a ring of visible nozzles and a maintenance hatch.
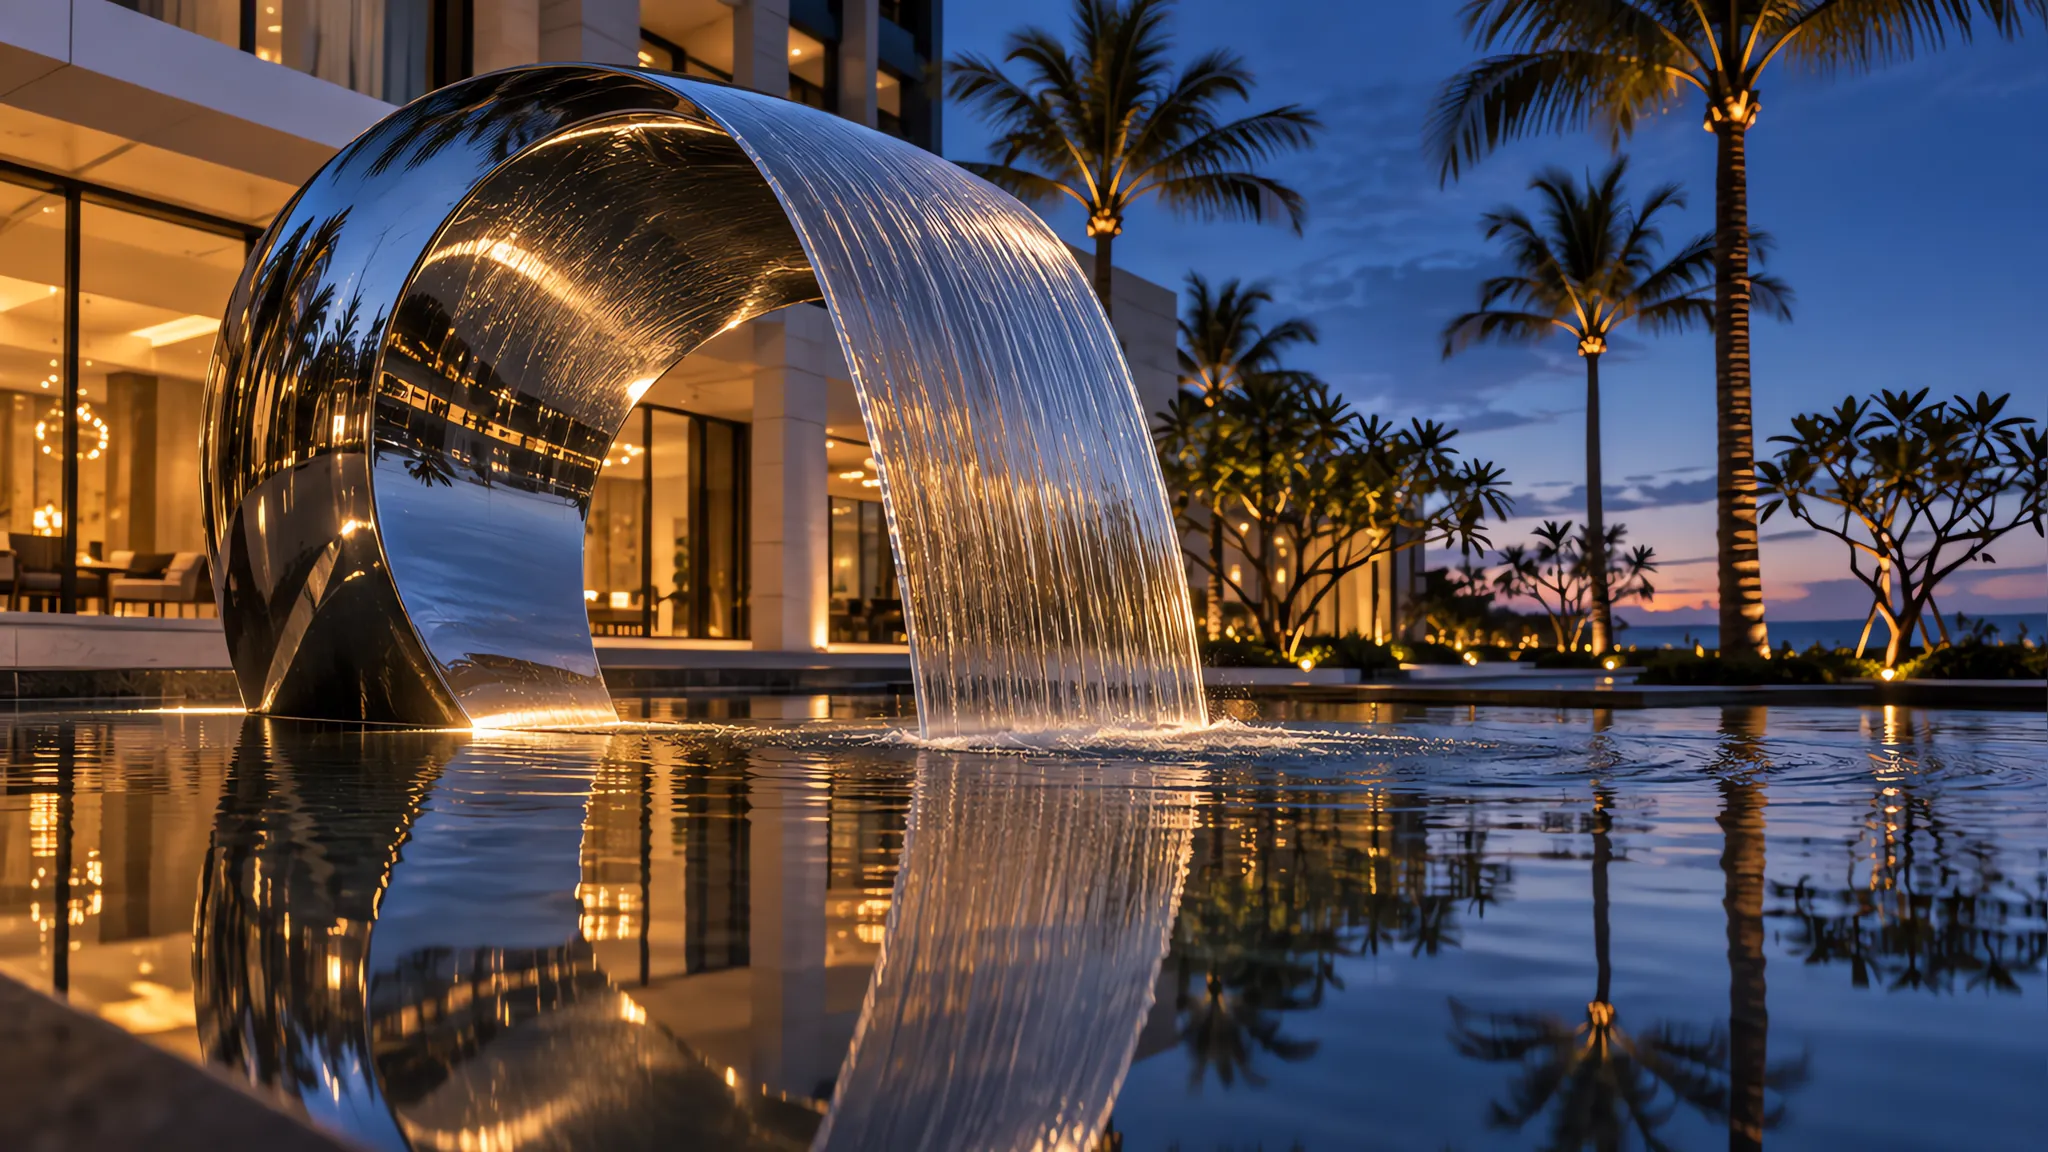
Engineering Reality: Pumps, Overflow Edges, Wind Spray and Water Chemistry
Pump duty. A water feature is low-head, low-flow work. The pump is sized to deliver a specific flow per metre of weir so the film stays continuous, and to lift water from a shallow catch trough a few hundred millimetres below. A fountain is the opposite: it needs head and pressure to throw water to a designed height, plus enough nozzles to shape the display. A three-metre jet cluster can easily need 2.2–4 kW, where a comparable sheeting water feature usually runs in the 0.75–1.5 kW band. That gap shows up in the plant-room size and the monthly bill.
Overflow edges and basin volume. With a water feature the weir is the whole game. The overflow edge has to be machined and levelled so the film is even across its full length, typically within about a millimetre; an uneven edge produces a dry patch or a heavy lobe that reads as a fault. Because the water surface is contained and recessed, the trough can be slim, and the critical structural work is a base that will not settle. A fountain needs the opposite: a deep basin sized to absorb the surge draw-down when the jets start — usually two to three times the visual water volume — plus a pump chamber a technician can reach without draining the pool.
Wind spray. This is the practical differentiator on exposed sites, and the one most often designed out too late. Jets throw water into the air, and wind takes it sideways: wet walkways and a slip risk, mineral staining on paving and glazing, and accelerated corrosion on nearby aluminium handrails and signage. A contained water feature keeps its water inside a recessed trough, so drift is near zero and the piece can sit directly beside a walkway, a restaurant terrace or a pool deck. If you want jets in a breezy location, budget for a wind study, a recessed trough, slot drainage and possibly a raised deflecting lip.
Water chemistry and evaporation. Where chlorine or salt is in play — beside a pool or on a coastal site — specify 316 marine grade rather than 304, and seal the surfaces. An open fountain basin loses far more water: evaporation plus airborne drift means constant top-up and chemical dosing in a hot or windy climate. A water feature with a covered trough exposes very little surface and needs very little make-up water. Both systems need filtration; the fountain additionally needs skimming and nozzle descaling.
Maintenance and Running Cost
Running cost is pump energy plus make-up water, chemicals and the labour to keep the water clean. Because the fountain pump works against a higher head and the basin loses more water, a fountain normally costs more per month than a comparable water feature on the same site.
Maintenance focus differs too. A water feature asks you to keep the weir edge clear and free of scale so the film stays even, and to rinse the polished surface. A fountain asks you to de-scale nozzles, skim the basin, manage algae and hold the water chemistry in range, because an aerated open basin is a much friendlier environment for biological growth.
There is also a strategic cost that never appears in the maintenance schedule: downtime visibility. If a fountain pump fails, the site loses its focal point and the empty basin becomes the story. If a water feature pump fails, the sculpture still stands. For a brand judged on the first ten seconds of arrival, that resilience is often the deciding argument.
Stainless Steel Water Feature vs Fountain: The Decision Table
| Criterion | Water feature | Fountain |
|---|---|---|
| Primary visual | Mirror-polished sculpture with a moving film of water | Jets of water thrown into the air and shaped |
| Water behaviour | Thin sheet over a form, or a still reflecting plane — contained | Aerated droplets and vertical displays — open basin |
| Spray and wind risk | Minimal; water stays in a recessed trough | High on exposed sites; drift wets paving and nearby finishes |
| Placement freedom | Can sit beside walkways, terraces and dining areas | Needs open fetch, wind analysis and often guarding |
| Evaporation and make-up water | Low — small exposed surface | Higher — large exposed surface plus airborne losses |
| Pump duty | Low head, low flow, sized to the weir perimeter | Higher head and flow; larger pump and supply |
| Basin and structure | Slim catch trough; the critical work is a stable, level base | Deep basin to absorb surge draw-down, plus plant chamber |
| Sound | Soft, continuous murmur | Broadband and active; useful for masking traffic noise |
| Reads when the pump is off | Yes — still a sculpture | No — an empty basin and visible nozzles |
| Cleaning focus | Weir-edge scale and even film | Nozzle descaling, basin debris, algae control |
| Water treatment | Closed loop, easy to keep clean | Open basin, skimming and dosing required |
| Typical running cost | Lower | Higher |
| Best suited to | Hotel arrivals, courtyards, lobbies, terraces, poolside | Plazas, retail, parks, leisure and family settings |
When to Choose Each: Hotel, Plaza, Pool and Coastal Sites
Hotel arrivals and courtyards. A water feature. Guests walk past it and photograph it, and a wet walkway is unacceptable in a hospitality setting. See how a mirrored piece works in a confined court in our boutique hotel courtyard water feature project, where the film runs continuously and the overflow edge hides inside the planting.
Commercial plazas, retail and parks. A fountain usually wins, because the brief is activity, gathering and noise masking rather than quiet luxury. Our resort pool fountain project shows the configuration to expect: bigger pump, deeper basin, a service chamber and a wind analysis before the nozzles are fixed.
Pools and terraces. Specify a contained water feature in 316, because chlorine and salt are both present. If a fountain is essential, keep its basin hydraulically separate from the swimming pool and site it where drift will not reach the deck.
Coastal and marine sites. Both are buildable in 316 marine grade, but salt air plus wind makes a fountain the riskier spec: drift carries chlorides onto surrounding finishes and accelerates corrosion on adjacent metalwork. A contained feature with sealed surfaces is normally the safer long-term choice.
Mixed-use or uncertain briefs. A hybrid works well: a sculptural stainless form with a small, contained jet cluster at its base. The sculpture reads with the pump off, the movement reads when it is on, and the water never leaves the trough. Several pieces in our project portfolio are engineered this way.
If the site is a genuine water-feature brief — hotel, resort, terrace or poolside — start with our water feature application page for the material and engineering logic we apply by default. Then send us the plan, the prevailing wind direction and the power available, and we will come back with pump duty, basin volume and a rough running cost for each option, free and within 24 hours. That comparison, done before the design is frozen, is the cheapest decision in the whole project.